BEHIND THE SCENES - ANIMATION EXPLAINED
How does my animation work? What software did I use? What were the risks and challenges that go along with production?
In other words, why does animation take such a long time in the making?
As you keep reading this page, I will answer all these questions about my animation projects since 2010 and 2011.
FLASH ANIMATION
When I ventured into Adobe Flash for the first time, it was a bit of a
challenge to conceive a story as real as it can get. Although I had experimented with
the Adobe software for the many things I could do, it wasn't until one story had finally came into fruition that I could see the possibilities available to me in Adobe. With that said, the story was animated, and it made a huge impact on the audiences ever since its debut in 2011. During that time, I had also used Photoshop, Illustrator
and GarageBand. Let's go behind the scenes of Flash-animated Aldrid Von Pectos the Strong Man.
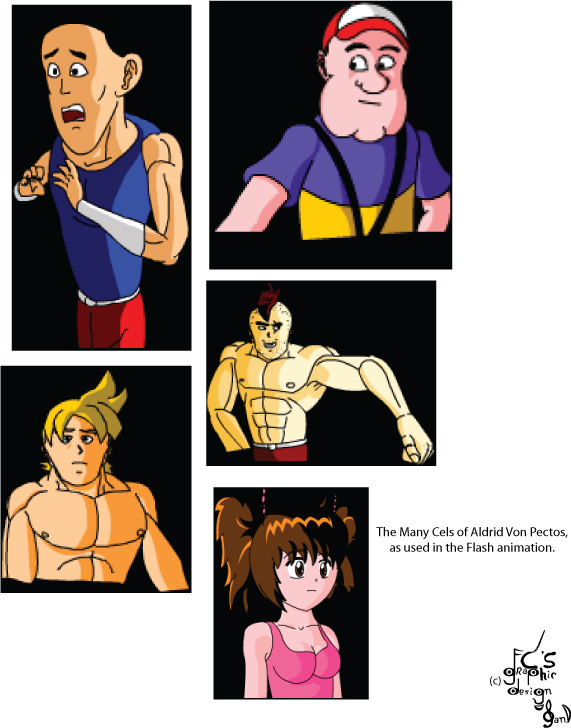
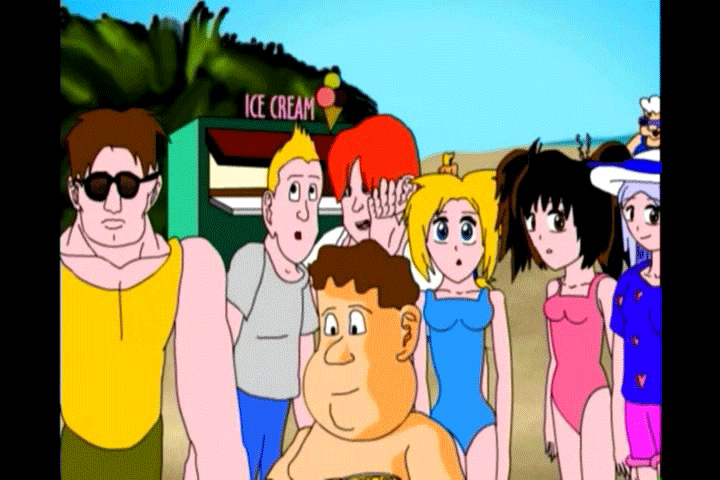
The "cels" drawn for Aldrid Von Pectos the Strong Man were actually vectorized graphics created for the Flash animation.
Clock-wise: Aldrid Von Pectos, Coach Billy Bobs, Buck Bulk, Cara Millin, and Jason Strangleburg.
Aldrid Von Pectos the Strong Man was started during which I took a class called the Design and Interactive Media course at Northeast Metro Career and Techincal Center.
During that time, I had learned how to use Flash as well as using Photoshop and Illustrator for many other projects
by using the company's software as well as putting my professional skills to the test. I had also learned about using
GarageBand, which applied a convenient source to get sound effects, to record voices and in general, to make music.
I started production of Aldrid Von Pectos the Strong Man on March 28th 2011. The only other production name I was
considering before I settled on Aldrid Von Pectos the Strong Man was Aldrid Von Pectos the Muscular Bodybuilder. However, the name
was considered too long for an animation, so the words "Strong Man" were used to shorten the title, making it easier to remember.
The software for Aldrid Von Pectos the Strong Man was animated using Adobe Flash CS3. At first, Flash was used independently for the first few scenes that were animated until Adobe Photoshop was used later for higher-quality background artwork painted from scratch. This would be saved out into PNG files so that the transparent sky placement could be seen through other layers as I had intended to keep using Flash's own built-in gradient tool to create the sky background.
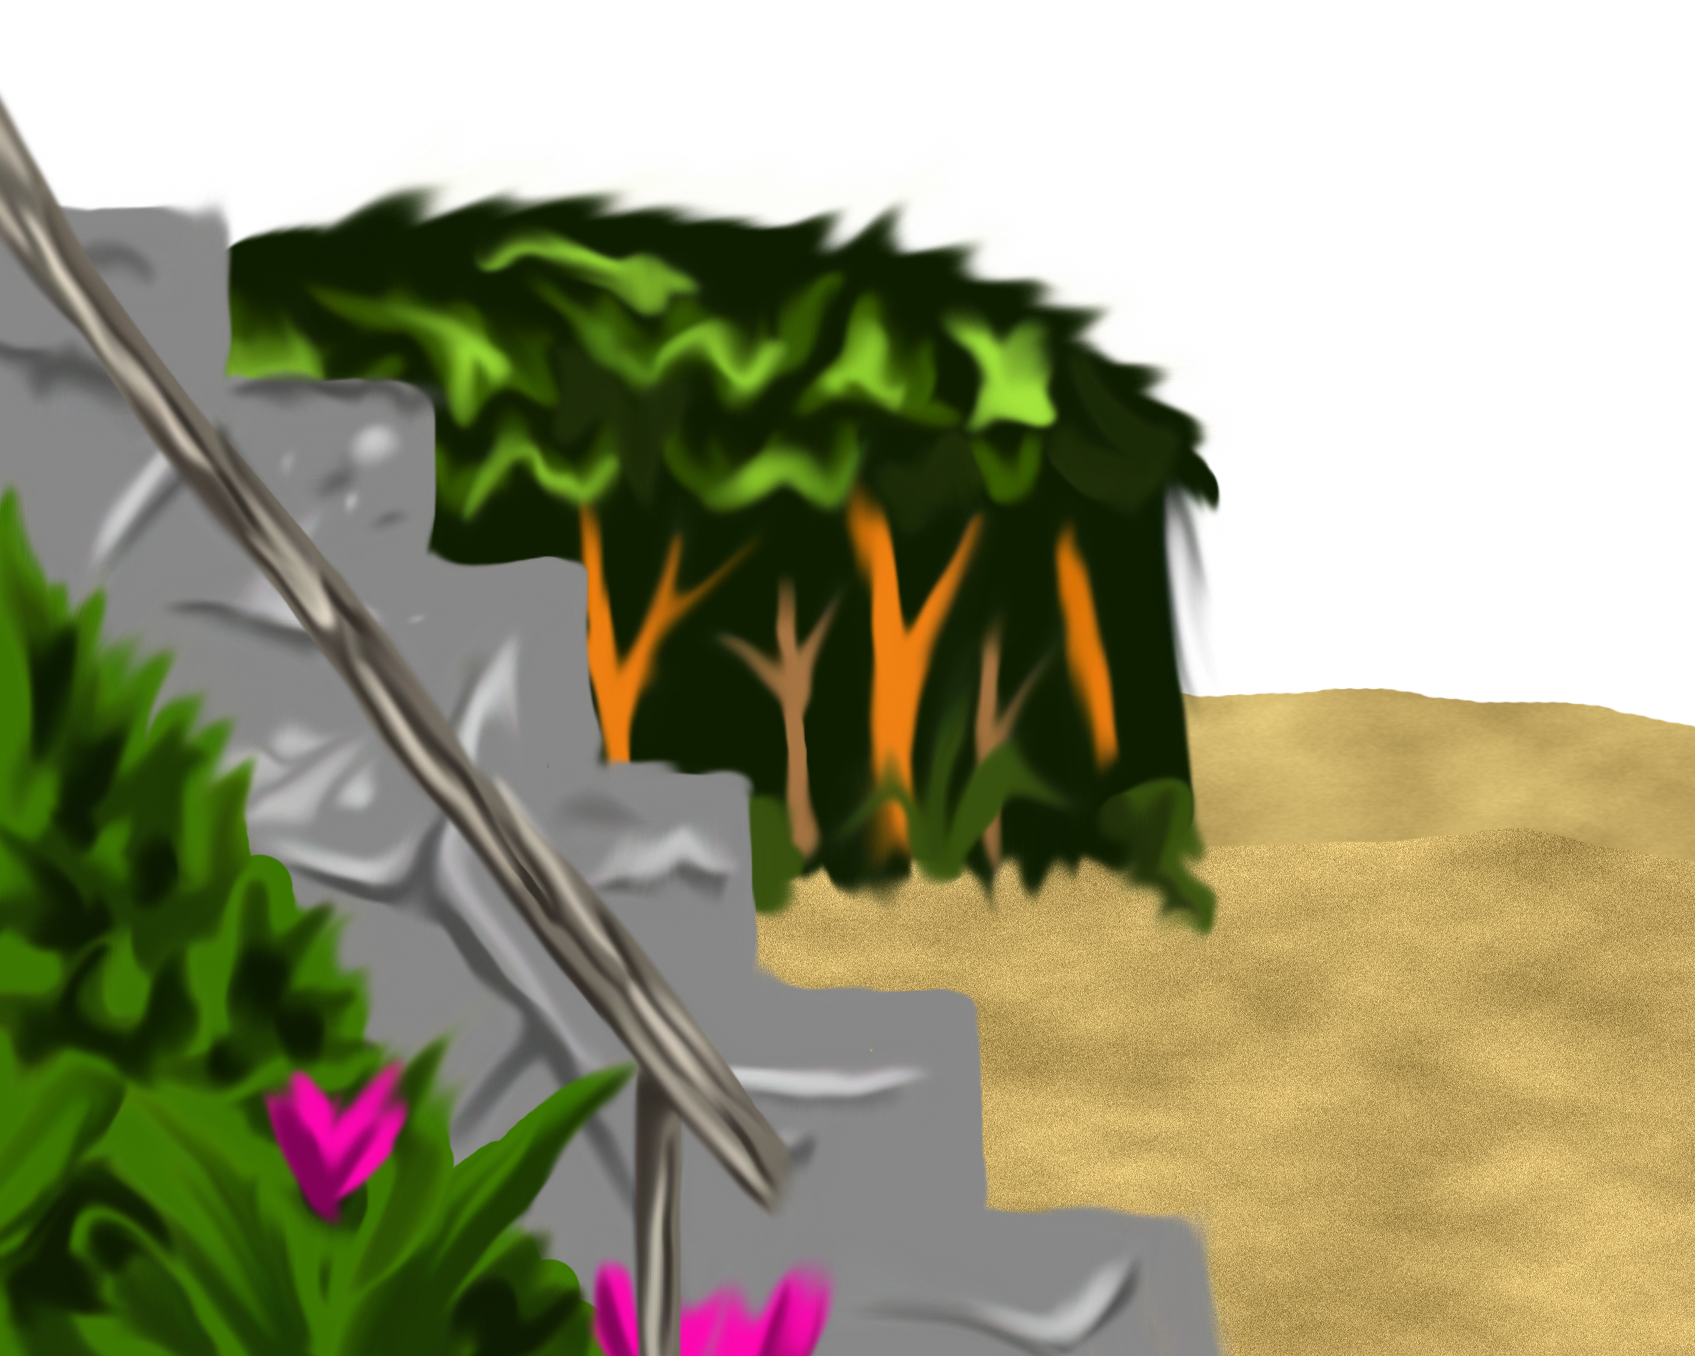
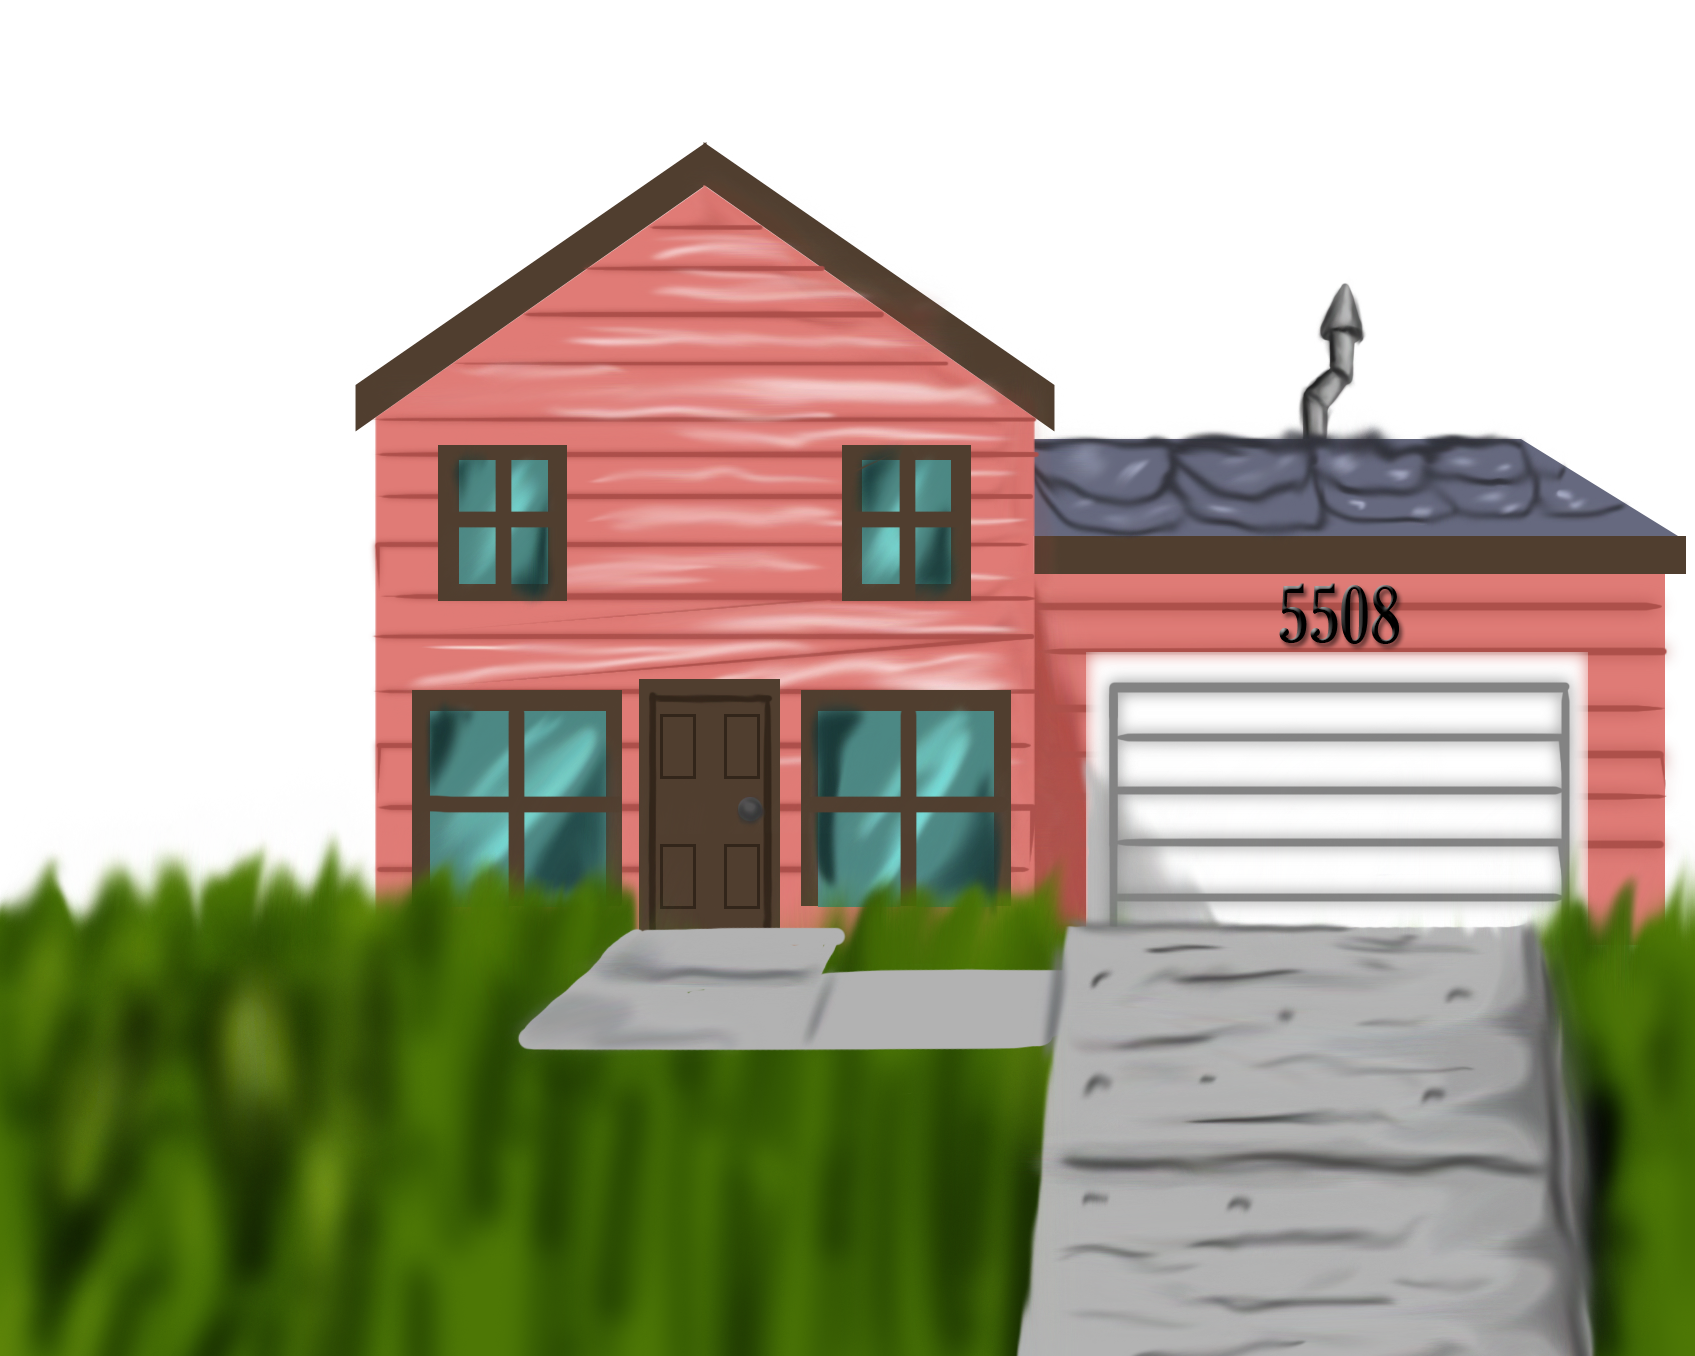
A few examples of background artwork painted in Photoshop saved in a .png format, which supports transparency.
SOME INTERESTING FACTS ABOUT ANIMATION TECHNIQUES
Because Adobe Flash utilizes 2D animation, many of the techniques used in Aldrid Von Pectos the Strong Man were inspired from the works through many of the classic Walt Disney productions. Adobe Flash also has a built-in feature called the "onion skin" which acts as a translucent guide for the previous frame that was drawn. As I had recently found out, each Flash document I had created for the project was set to 12 frames per second, as opposed to 24 frames per film (30 frames per second after the computer was invented)
MULTI-PLANE CAMERA
Rather than animating a single piece of flat artwork on the screen, I used what's called the "Multiplane Camera" effect. The multiplane camera made its debut in 1933, in which the effect was first invented by Ub Iwerks, a former Disney animator and director. The effect was achieved by moving the foreground art separately from the main background, and it was a staple for many animated movies by the works of Walt Disney and Fleischer Cartoons.
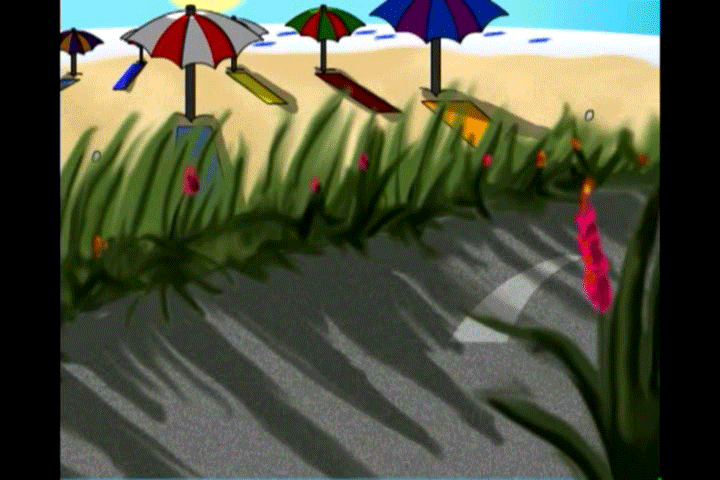
The car stopping at the driveway as well as the camera, or stage, panning across Cara Millin
and other beach goers are primary examples in which the multiplane camera shows how
one scene is made up of different animation layers, as opposed to one single layer.
EDITING
Editing Aldrid Von Pectos the Strong Man, at least in the video department, takes place mostly in Sony Vegas. Back then, it was 4.0. Because the SWF files cannot be imported to be edited, they had to be converted into a digital video format that has the compatibility in order to be imported and edited into what would be the final film. While the title card of the animation was animated with opacity fading like typical film titles would do on-screen, the end credit titles were generated in Vegas.
Because animating too many layers on a Flash document can cause the program to crash, the edited audio with dialogue and sound effects had to be cut down to size to animate the story with a few scenes at a time per document. The audio recorded and edited for the animation acted as a guideline for how the animation should look and what actions the characters should perform. The audio can also act as a guide for lipsyncing, which will be discussed later.
LIPSYNCING
Although this lipsyncing feature might not have been built into Adobe Flash itself, there’s a plug-in installed in the program called “SmartMouth”, which indeed made lipsyncing easier.
For each character, their mouth-pieces would have to be drawn separately from the main head layer. Each of the mouth-pieces would be assigned to the correct vowels and consonants (A, E, I, O, U, F, L, V, M,). Once assigned, the “Tell Me, SmartMouth” button would process the phonemes into the dialogue within the audio.
The phonemes may or may not be placed correctly, nor would they accurately select the exact mouthpieces for each character, so the frames would have to be manually adjusted whenever the lipsyncing doesn’t look right.
WHAT I HAD LEARNED BUT DIDN’T KNOW AT THE TIME
If there’s something I’ve learned from using Adobe Flash but didn’t know what I could do at the time during production, it’s the adjustment for the frame speedrate. As it turns out, many of the Flash documents created for the animated scenes were set to 12 frames per second by default, which was primarily the reason why the speed rate of the animation was out of sync with the audio, which was set to 29 frames per bitrate.
What’s challenging about the Flash animation was getting everything drawn right. As stated earlier, because Flash utilizes 2D animation, it can be very tricky getting proportions right. Drawing frame by frame can be a painstaking long process due to the tedious hand-drawn techniques emulated throughout the animations.
A film runs at 24 frames per second (30 frames after which the computer was invented). An order of at least 7,000 drawings would be needed in order to animate a five-minute cartoon while a feature-length film like Bambi (1942) would necessitate the accomplishment of two and a half million drawings.
3D ANIMATION
With Aldrid Von Pectos the Strong Man completed on November 10th, 2013, there’s no doubt for what my next production would be. The next followup to the Flash animation is a computer-animated short called Heather’s Under the Weather, which focused on a girl named Heather Meteorous whose emotions connect to different weathers. For example, whenever Heather cries, the weather rains while the sun shines whenever she’s smiling.
The next step after 2D animation is 3D. 3D animation is a medium of animation which deals with the three-dimensional environment animated on computers ever since Pixar Animation Studios released Toy Story (1995).
The software I had attempted to use first was Autodesk Maya. While Maya hadn’t had any progress with story development, the main focus was to learn the basics of 3D animating, which we’ll get to later on.

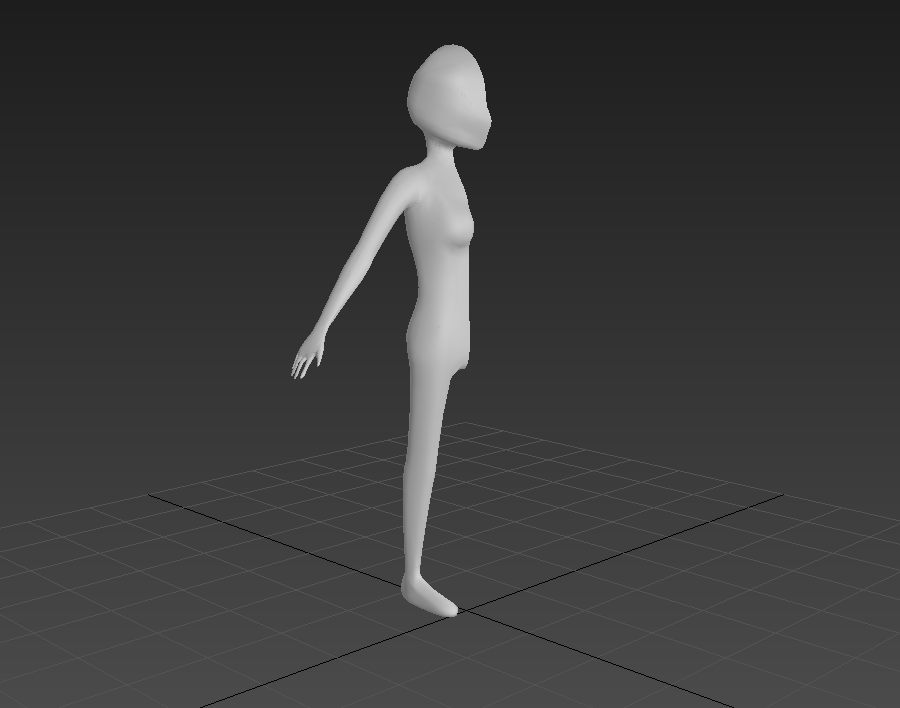
The first attempt at Heather’s character, which was created in Maya Autodesk
Production on Heather’s Under the Weather would continue during the time I went to Century College to take the 3D animation track. At that time, the class was using 3Ds Max, though I was to be assigned to start animating the “Skateboarder” animation where the skateboarder fell down at the skating rink.
According to tradition, many businesses out in the industry use Maya to make movies whereas others use 3Ds Max to make video games. Nowadays, the two 3D modeling programs are versatile enough to create both films and video games.
MODELING
For Heather’s Under the Weather, a total of 7 different characters were modeled. Modeling is always the first step when creating the characters. For simpler convenience, the character would start out with the creation of the cube.
Creating a primitive such as the cube would have the options for division segments by length, by width, and by height. It is recommended that the width segments must split the “box” in half in which the one half would be deleted. Before doing so, the model must be converted into an editable poly.
As demonstrated in 3Ds Max, half of the character's mesh had to be deleted before the Symmetry modifier would be added.
The reason why one half of the character mesh had to be deleted was so that the symmetry modifier can be applied onto the character of which I am fond of. It is effective; while one side is modified, the other side would automatically follow suite. The extrude tool was used to extend the poly surfaces to create arms, legs, fingers, toes and the head. Once the whole model has been completed, the symmetry modifier would then be collapsed.
Although the characters looked blocky and low-poly at first, the solution to that problem would be to apply the MeshSmooth modifier, which smoothed the overall look on the character.
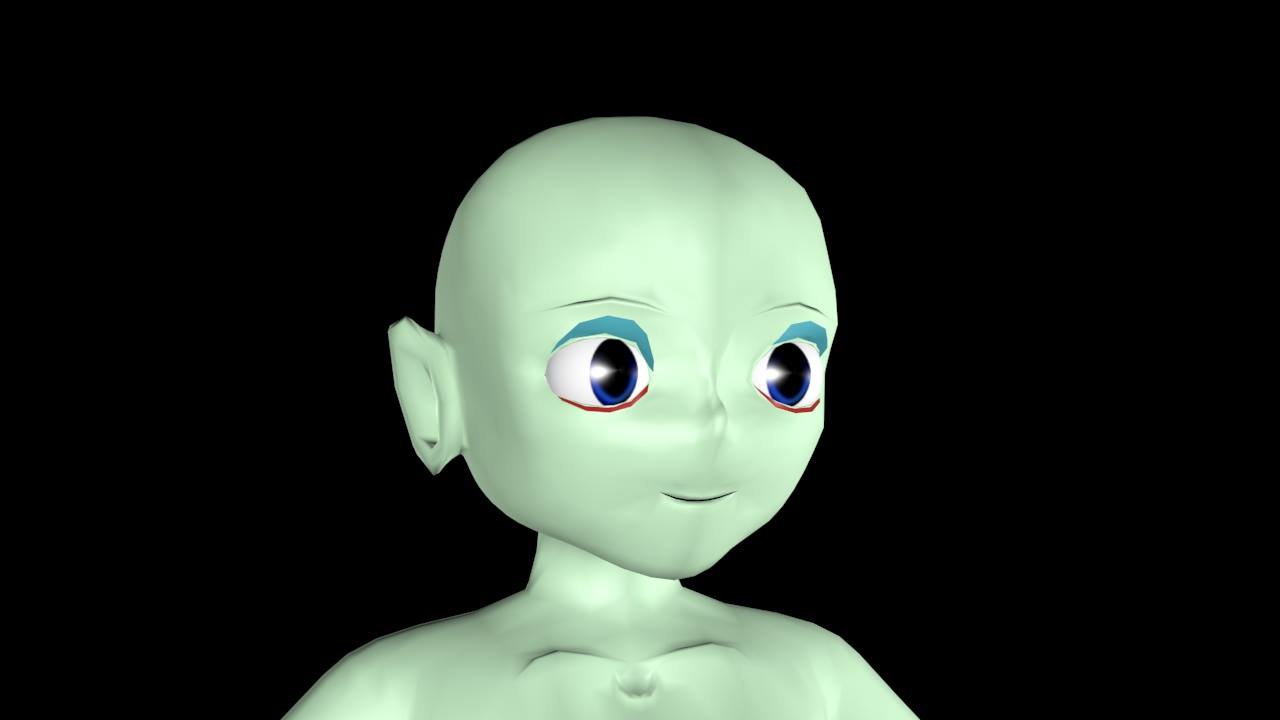
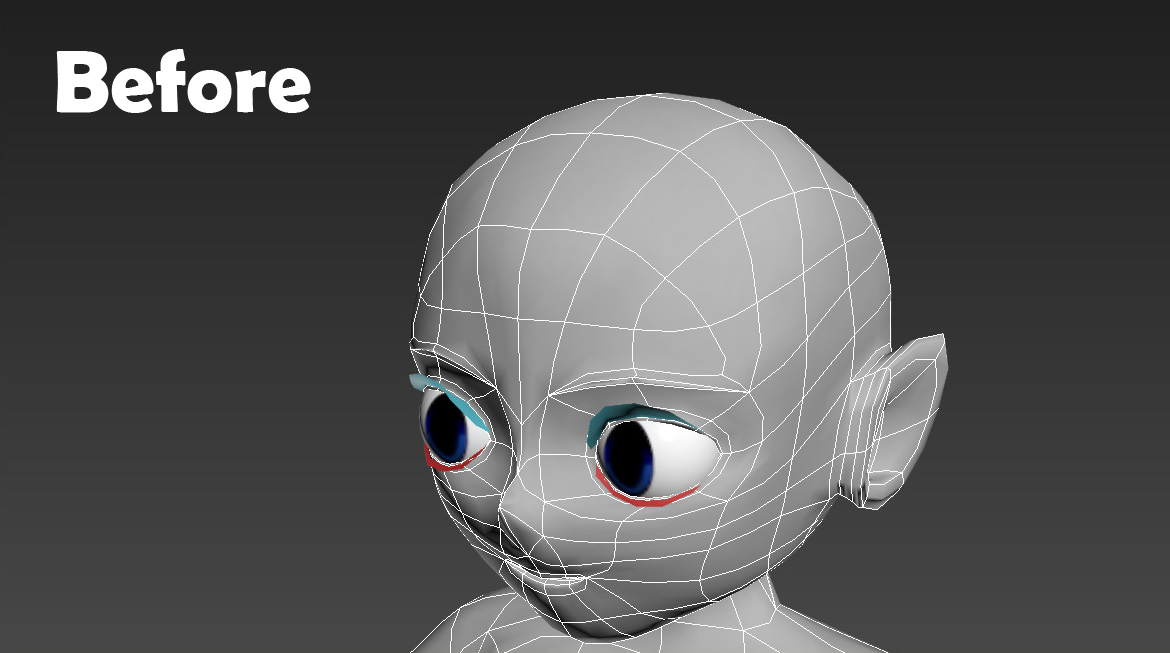
The eyes for the characters were mere spheres and would be placed inside the head, which is usually hollow. The pupils would have to be textured first before the main model itself so that the textured pupil on the sphere will align with the eyelids. I'll talk more about texturing in the next section.
Heather, as first modeled in 3Ds Max 2015. Note that the eyes had already been textured before the mesh would be as well.
When it comes to the character’s mouths, they would be either extruded inward for the mouth roofs inside, or simply extruded inward into lips, while the eyelashes were created from plane objects.
TEXTURING
Once the character models are finished, texturing comes next. The “Unwrap UVW” modifier would be added. Seams were created all around the mesh to coordinate the mappings on different surfaces. When a surface of faces on a mesh is selected, the “Pelt Map” window would be opened to pelt the mapping to prepare for texturing. The selector would be selected to be scaled up as much as possible. The mapping would then be stretched and pelted. Once every UV mapping is pelted on the mesh, the entire mappings would be selected to pack the UVs to fit into the UVW window.
After assigning the UVW texture mappings on the mesh, the viewport canvas would be used to paint the textures onto the mappings. With every procedure to start using the viewport canvas, a diffuse map had to be created in order to assign the texture to the mesh. The texture file size would then be set to 1024 x 1024 pixels.
The three maps I mostly used were the diffuse, bump, and opacity maps. The diffuse map defines the color of the texture. The bump map defines the bumps and ridges on a texture whereas the opacity map defines which parts of the texture were to be invisible.
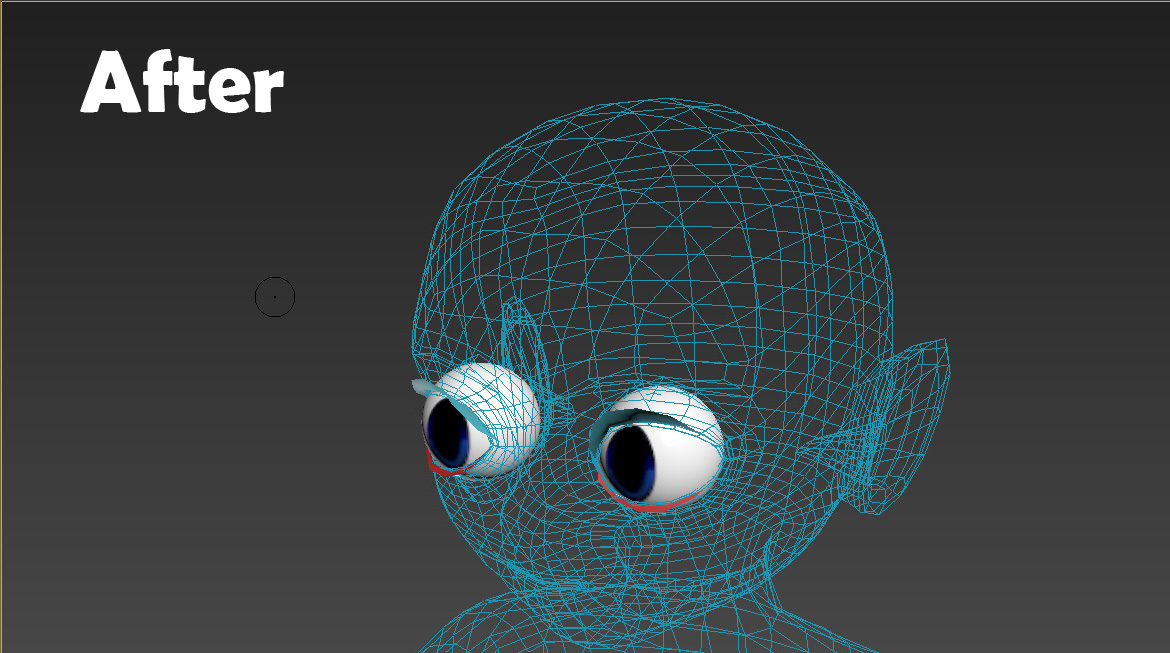
Before and after: Heather's mesh in the 2015 version of 3Ds Max.
Note the glitch when the mesh turned invisible in the default 3D drive whenever the Viewport Canvas mode
is turned on. This can prevent textures from being applied onto the mesh when in use.
There was a glitch with the viewport canvas in the 2015 version, as such when the default “Nitrous Direct3D” prevented the mesh from being painted, turning the mesh into an invisible grid. What was the solution? In 3Ds Max 2015, I went to the Customize Menu > Preferences > Viewports Tab. Then at the bottom, I changed the driver to legacy3d. Fortunately, the glitch wasn’t present from the 2016 version onwards, so I was able to use the default driver without any trouble using the viewport canvas. Occasionally, I have used Photoshop to create the textures, but that’s another story.
RIGGING
The rig is what makes the characters move, much like how you would work with string puppets called marionettes. The way how rigs should be set up on the characters would be to freeze the characters so they won’t get selected by mistake. Before freezing object selections, make sure to turn on the See Through feature by checking the “See Through” checkbox. This would be easier to see where the rig would align through the center of the mesh from the head to arms and legs. With that said, each bone in the rig was carefully aligned with the different parts of the mesh’s skin.
The rig system I used in 3Ds Max is the CAT Rig. CAT stands for Character Animation Toolkit. In this case, since most of the characters were humans, I used the Base Human preset, albeit with a few modifications. Because the preset does not have fingers by default, these can be added in the adjustment parameters whenever one of the hand rigs would be selected. A total of five finger bones were made; four of them would move the fingers while the other would move the thumb. The feet, on the other hand, were each set to two digits for flexible feet motion. The parameters for the hands and feet can be copied from one side to the other.
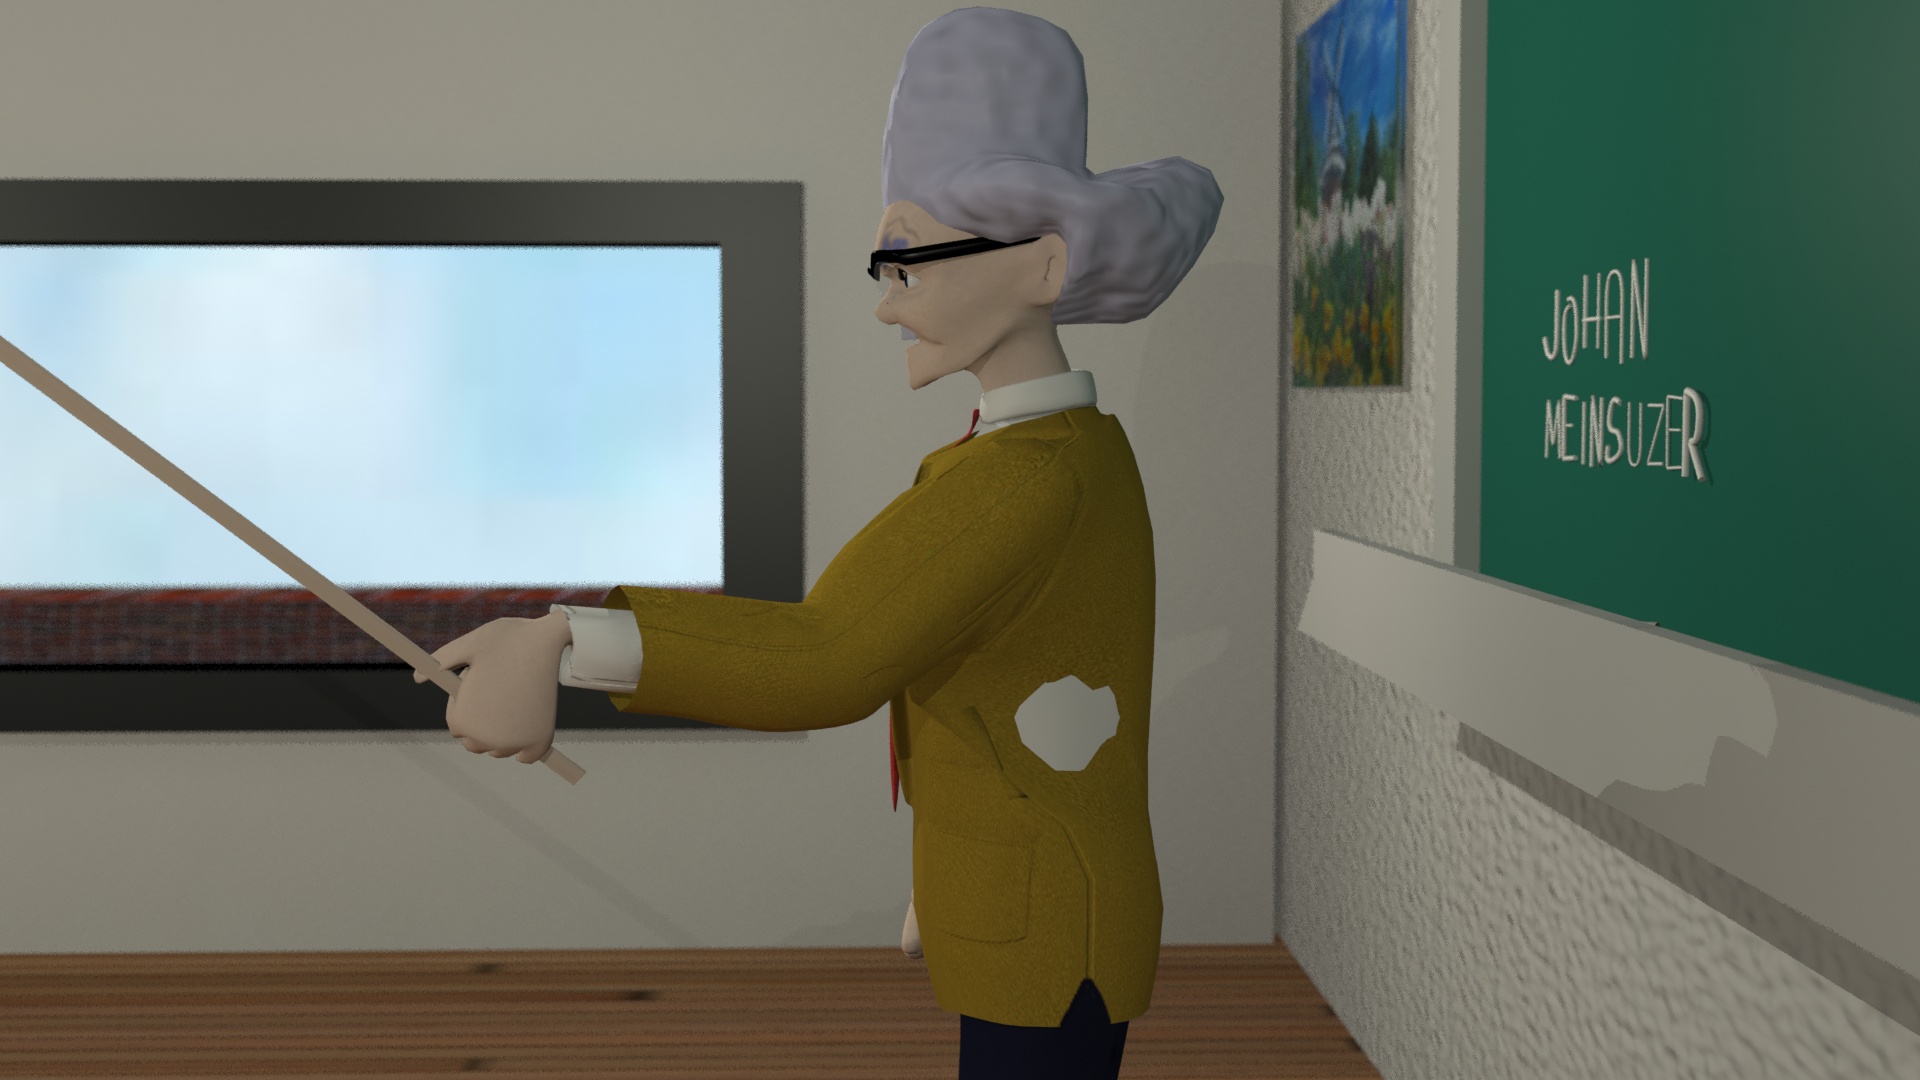
The CATRig had to be fit snugly into the character, such as where the elbows and knees would bend, where the head would turn, etc. The toes weren’t a major concern, so it wasn’t really required to move them individually as most of the characters would wear shoes, with the exception of bare-footed Farmer Joel.
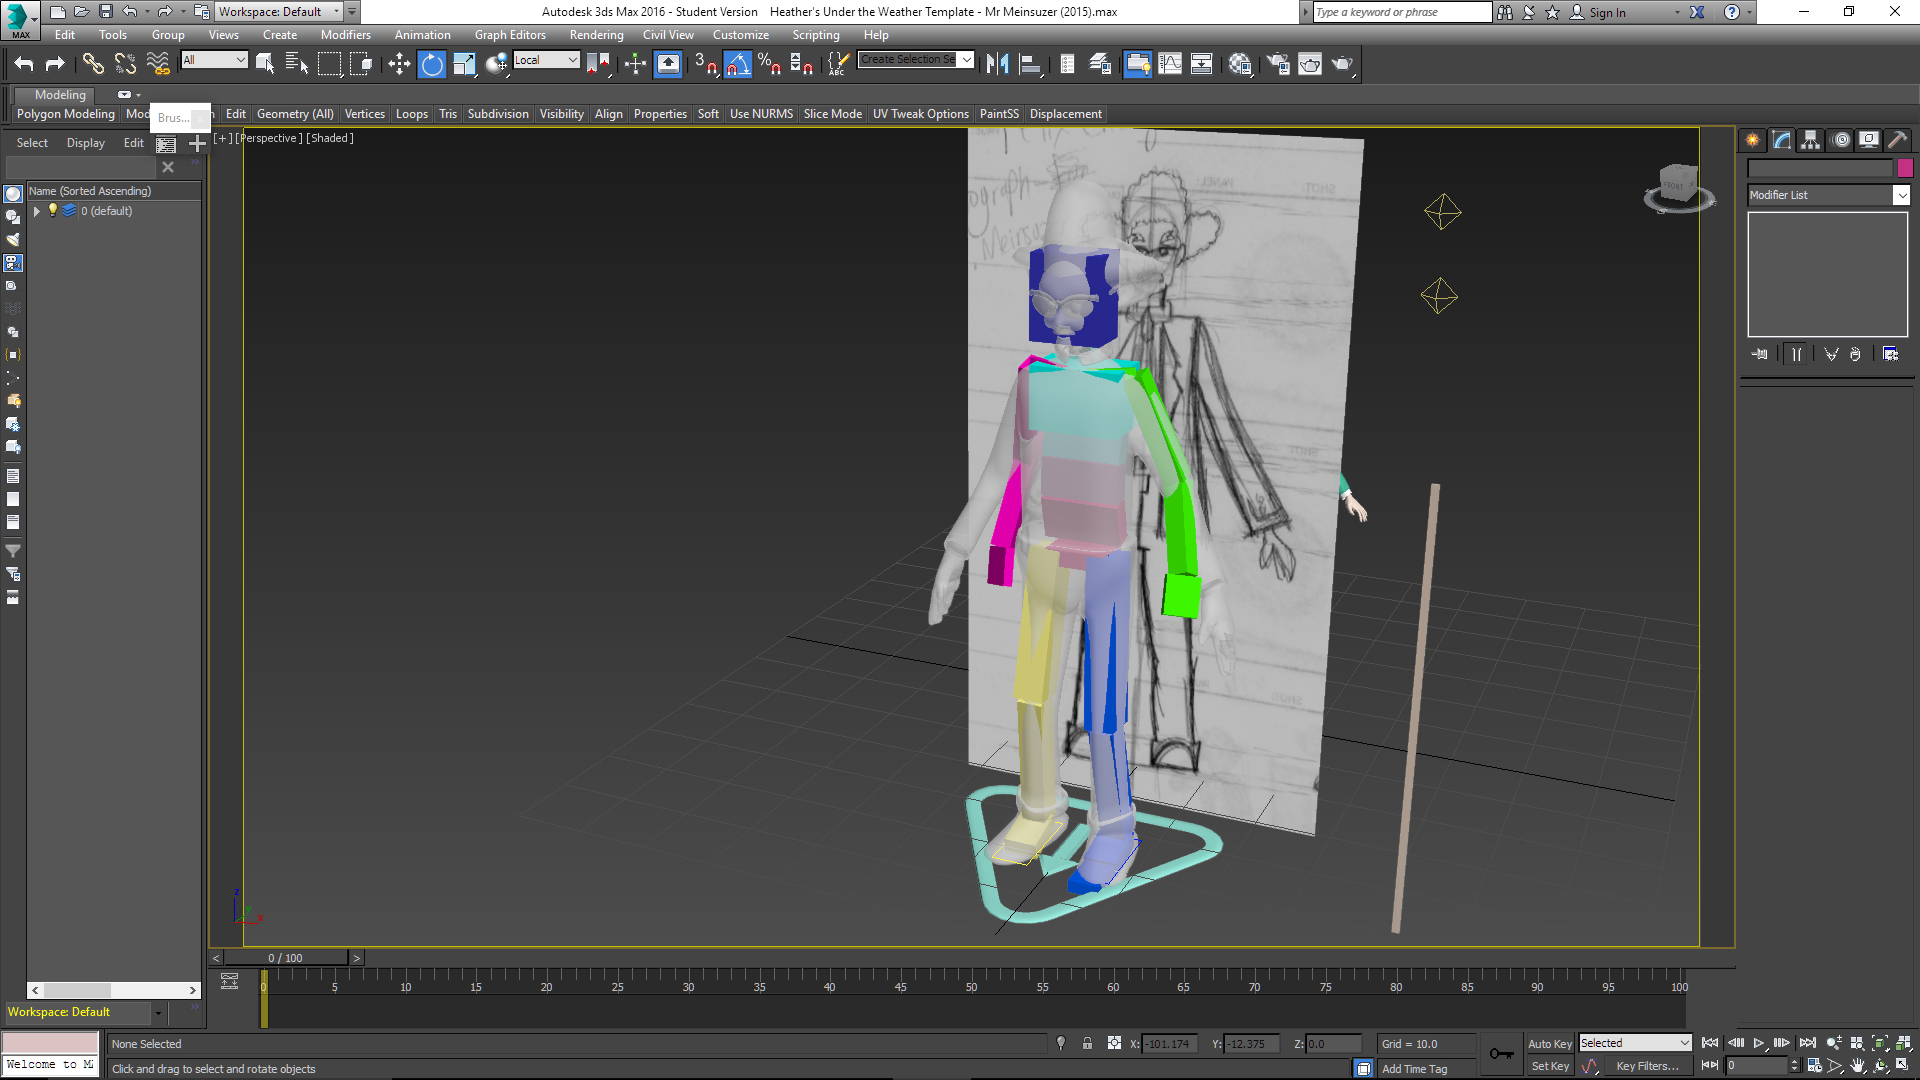
Mr. Meinsuzer with his CATRig being installed. Note that each CAT Rig would be embedded directly inside the character.
Once the rig’s set in its proper position with the characters, I would apply the skin modifier on the characters. The skin modifier would assign the number of vertices on the mesh to deform along with the rig, which, however, won’t process accurately. So, some manual adjustments on each skin deformation will take place. To ensure full skin deformation, the weight value would be set to 1.0. In turn, the area around the selected vertices would turn red. For easier convenience, the skin envelopes can also be mirrored from one side to another. After the skin weight adjustments, the rig was then ready for animating the character. Each bone had to be rotated from its pivot point based on how bones in the human body would pivot.
An important note is that the CATRig can be rendered out any time soon, so I had to make sure to create a selection for the character’s CATRig, right-click and hide the selection. That way, the character can animate but without the rig showing while rendering animation production. To unhide the CATRig, go to the selection bar and click on the selection named for the selected objects.
With the rig animation set up on the characters, the head rig can also link parts on the overall character that were modeled separately. For example, the objects separate from Heather’s head would include the eye spheres, the tongue, the teeth, the mouth roof, the eyelashes (both upper and lower), and hair pieces. These objects would all be selected, then, with the link button on, linked to the head rig in order for all facial appendages to move along with the head.
Heather’s facial appendages (the eyes, tongue, teeth, etc.) were attached to the head part of the CAT Rig
CLOTHING
There are two methods of clothing animation in general for different kinds of clothing. Let’s use Heather for example, who is wearing a sailor school uniform.
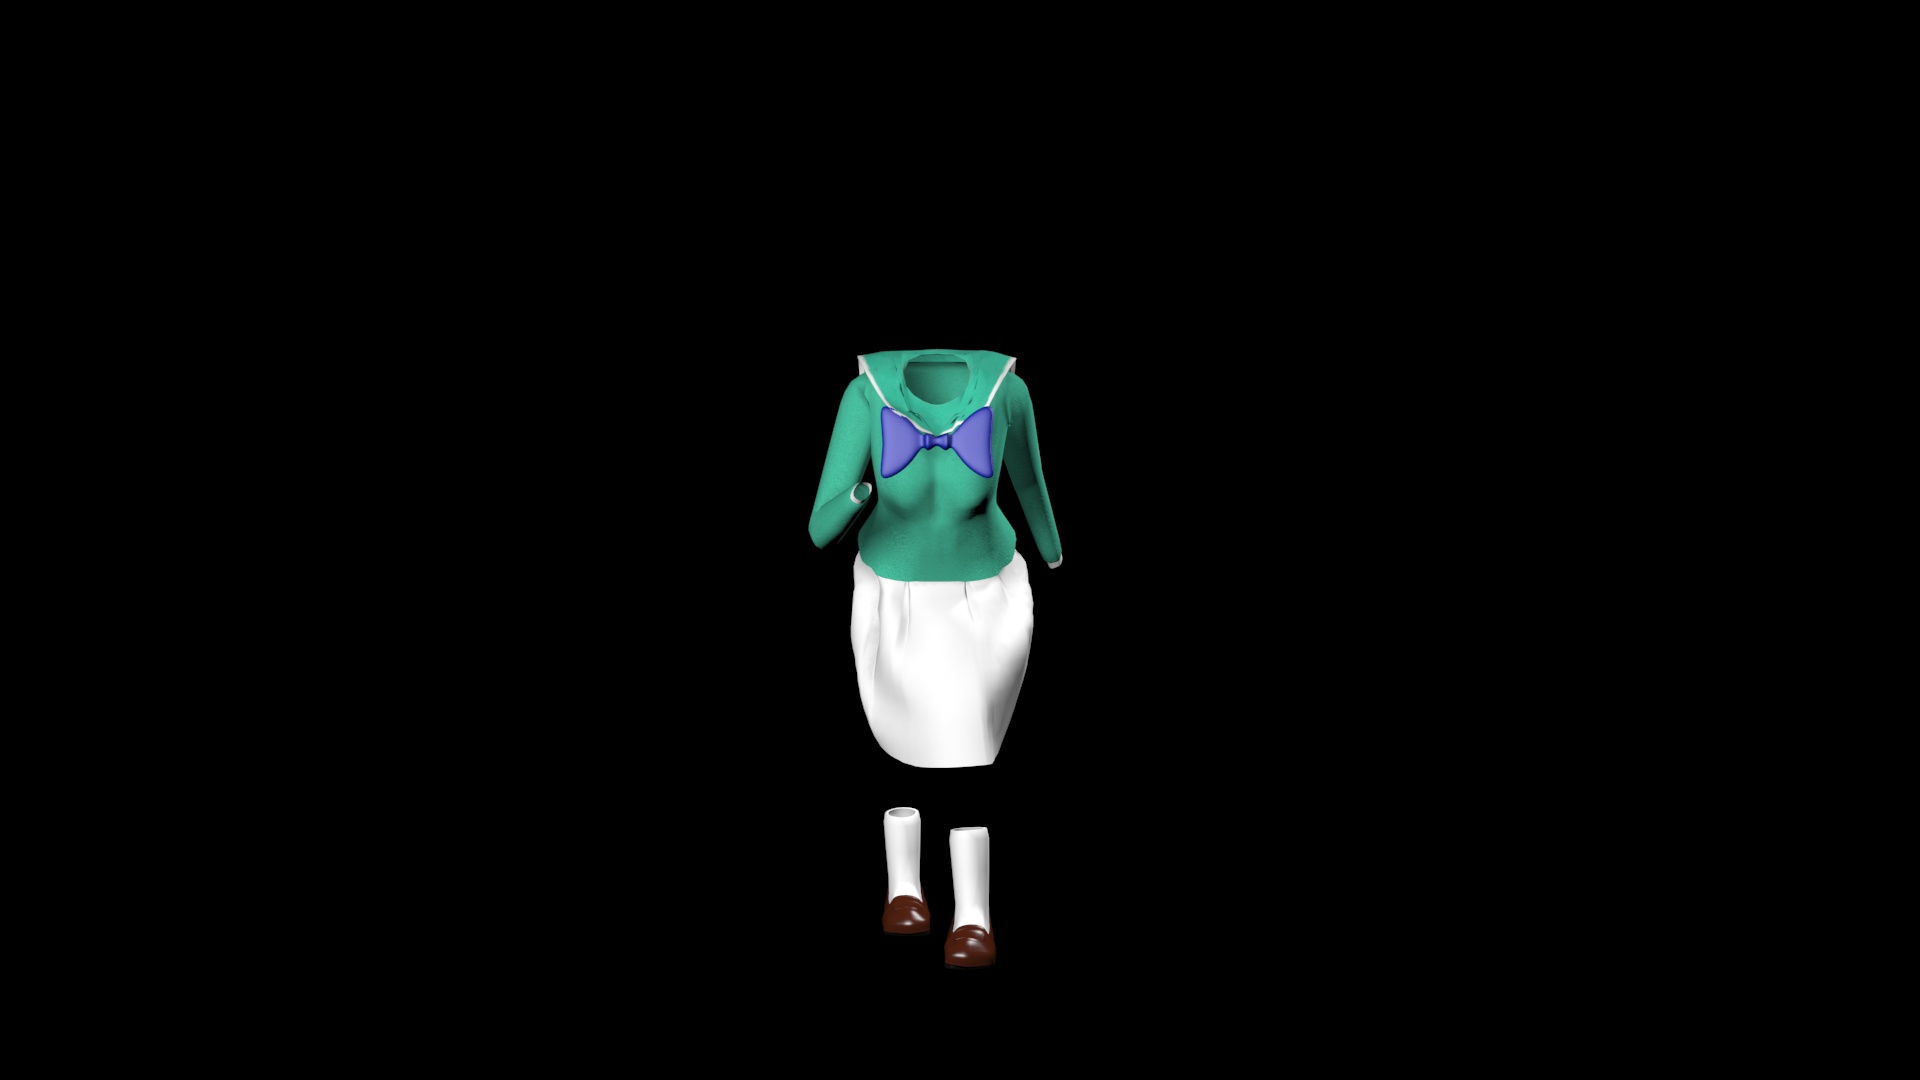
A complete assembly for the objects used to build up Cloudopolis High School's sailor uniform palette for Heather.
One method for clothing animation is the Skin Wrap modifier for the tighter worn clothing, which include the shirt, socks and shoes. The skinwrap modifier basically has the skin’s weight properties copied onto the shirt, socks and shoes, which animated the said clothing along with the character. In particular, Alec Sorenson had also used the skinwrap modifier for his clothes.
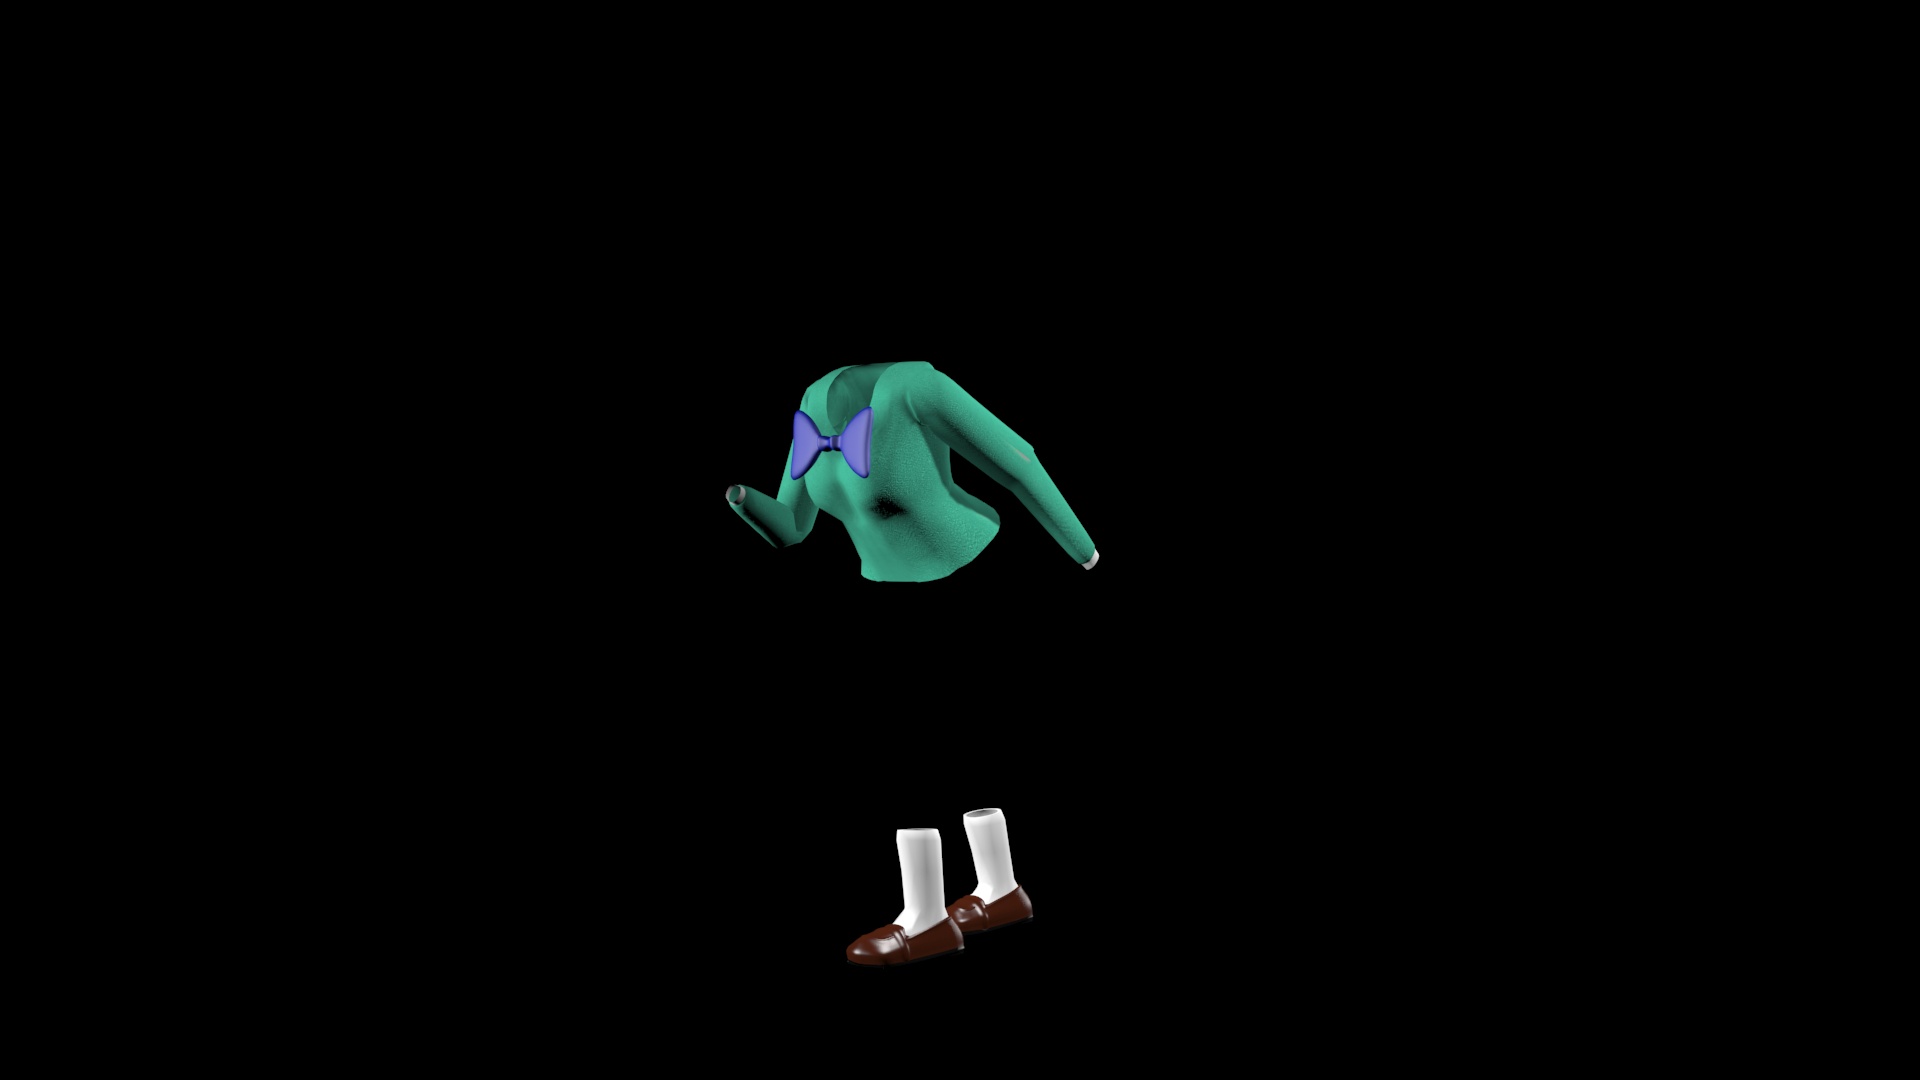
Heather's cloth pieces that used the SkinWrap modifier: The shirt, socks, and shoes.
The cloth modifier is another method for clothing animation, which was used for the more loose clothing – the remaining being the pleated skirt and the collar. Once the “Cloth” modifier was applied on each of the clothing, they would be assigned as “Cloth” objects in the Object Properties window. The main mesh, who is the wearer of these clothes, would be assigned as the collision object to collide against the clothing. The offset for both the cloth and collision objects would be reduced to 0.1 or 0.4 so that the clothing wouldn’t flail outward.

Heather's cloth pieces that used the Cloth modifier: The skirt, the sailor collar, and the ponytail.
The clothing does simulate nicely, except for the skirt, which wouldn’t stay on the waist. To resolve it, I created attachment groups by going to the “groups” sub-object mode in the “Cloth” modifier. The top most vertices of the skirt would be selected so that they were made into a new group titled “skirt-attached”. Once the group was created, I clicked on the “Surface” button and assign Heather’s main mesh as the constraint object so that the skirt wouldn’t fall down while simulating. The same cloth simulation process was applied for Heather’s collar so it doesn’t hang down the back against Heather’s neck up front.
The ponytail was also simulated in the same manner as the skirt and the collar, since hair in general tends to have the same flowing physiques as cloth. The top most vertices near where the back of the head would be were selected, then created as a group so that the ponytail would be attached to the head.
The bowtie was static, so it was simply linked to the torso of Heather’s rig and therefore, it doesn’t need as much work to do on it as the rest of the sailor uniform.
For Amanda Monchi, I would use the cloth modifier only for her dress. For Meinsuzer, I used the cloth modifier for only his jacket while with Farmer Joel I would use it for his beard, which simulated in the manner of cloth.
MORPHER MODIFIER & LIPSYNCING
Back when I had stumbled upon an attempt to rig a character, I at first thought that the rig could also control faces as well. That wasn’t the case though.
To animate the character’s faces into a wide range of facial expressions, from smiling to frowning, blinking and winking the eye, I used what’s called the “Morpher” modifier, which deforms the vertices that define the points connected that define the edges of the mesh by adjusting each slider. In Maya, the program’s equivalent to 3Ds Max’s Morpher is the Blend Shape mode.
To create the morpher animation, the mesh must be duplicated into what would be the morpher targets. Each of the morpher targets, which were duplicated from the original mesh, were modified slightly to represent individual facial targets (i.e., mesh with left eye closed, mesh with right eye closed, mouth open, mouth frown, etc.).
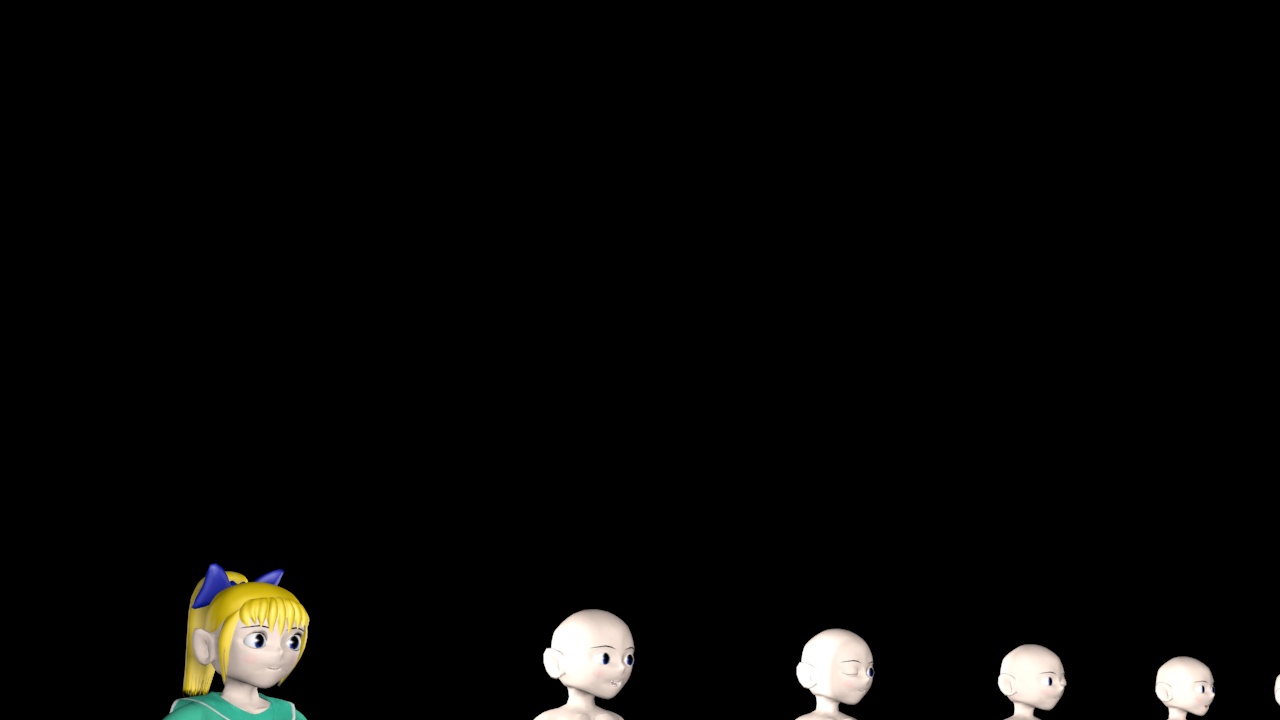
The many morpher targets of Heather which were duplicated from the original mesh.
The Morpher modifier would only need to be applied onto the main mesh because the original has all of the duplicates assigned as morpher targets. However, the morpher would not perform correctly if each target still retained the MeshSmooth modifier, so the MeshSmooth modifier had to be deleted on each duplicate representing the morpher target. The morpher targets can be adjusted by sliders giving the value between 0.0 and 1.0.
Like SmartMouth in Flash, 3Ds Max also has a lipsyncing plug-in, which can be downloaded from the Di-O-Matic website. The plug-in is called Voice-O-Matic. Whenever the dialog box opens, it would allow the morpher targets for the different mouth positions to be assigned to different phonemes such as vowels and consonants. Once the dialogue audio has been assigned, the plug-in automatically processes the mouth morphers into the audio according to each vowel and consonant. Of course, manual adjustments to certain frames had to be done if parts of the lipsyncing don’t match up.
Unfortunately, during that time, the Voice-O-Matic plug-in could only support 3Ds Max up to the 2015 version. It also seemed that no known later versions were made for 2016 and up to even later versions of the program.
Besides linking objects, the teeth in particular can be added as elements. Let’s take Mr. Meinsuzer for example. With his mesh selected, I would then go to the Editable Poly stack entry, go to the Elements icon (which would be the picture of a 3D cube), and assign both the upper and lower teeth halves to the main mesh as elements. This can prove effective with morphing as the teeth elements can be moved at any time. The same can be applied to eyelashes for eye-blinking morpher targets.
To conclude the section about the Morpher Modifier, here is a picture guide showing the correct modifier stack as shown for Heather.
Heather in 3Ds Max with the modifier stack - MeshSmooth (top), Cloth Modifiers (second-top),
Skin (middle), Morpher (second-bottom), and Editable Poly (very bottom).
Other modifiers such as the Symmetry and Unwrap UVW modifiers had already been collapsed.
ENVIRONMENTS
There would be no point in making an animated movie featuring only characters, so in this section, I will talk about making scenery called environments. The way the environment would be set up is like setting up a stage backdrop for a play.
To start, always use flat objects called “planes”. The first plane was created as the ground, or floor, which would be flat on the ground. Then, another plane was created via the front orthographic view at a 90 degree angle from the ground plane into the sky backdrop. Once created, the sky is then applied with the “Bend” modifier, which bends the sky into a curve. On a side note, make sure to apply enough width segments on the sky backdrop in order to achieve the nice, smooth curve. The bend modifier can also apply to the planes textured into trees.
A lot of designing was involved when building Cloudopolis High School. The building would start with the interior floor as well as the walls surrounding it along with doors and entrances. For other floors above the base floor, a few subdivisions and extrusions were made to provide room for each staircase from one floor up to another. The characters had to be in scale with the entire school building.
The sky backdrop plane can be limiting to cameras as the camera should not dolly extensively to the point of revealing the edges, which can ruin the effect.
All the objects, including the characters and environments, can be selected so that the motion blur can be applied.
MOTION PATHS & DUMMY HELPERS
When the base of the rig has the “Animation Mode” turned on, this can distort the rig whenever one bone is selected in an attempt to turn the character around. To resolve it, an invisible wireframe cube called a “dummy” acts as a helper which can guide the rig to how the characters would rotate. To constrain the whole rig to the dummy, select the pelvis rig and both IK handles for the feet only.
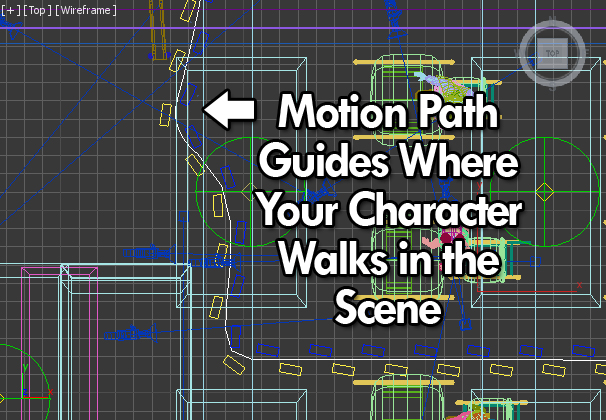
Motion paths that act as a guide where the characters would move.
Characters linked to dummies can also be constrained on a motion path, a spline that can guide where the character would walk. The only issue when turning on the walk cycle is that the character walk was misplaced, so I had to make sure that the dummy cube was rotated upright to the direction the character is facing.
PARTICLE SYSTEMS & SPECIAL EFFECTS
Particle systems are the effects behind drops of tears trickling down Heather’s face as well as drops of rain. For the rain, a particle system was created by dragging the system across the viewport to a specific size depending on the scene.
For the tears, on the other hand, I created a “facemask” from a plane object around Heather’s cheek area, which would be converted into an editable poly with a symmetry modifier, aligning the overall shape with the original mesh. Then, the Particle Flow system could be created elsewhere in the scene.
With the system created, in the Particle View window, there was a “Position Object” property, which was dragged into the particle event. Then, assign the tear cheek-mask as the emitter object where the tears would surface onto. There’s also the “Birth” property, which has the start and end properties where the particles would start generating as well as stop generating as well, depending on where to start and stop emitting particles.
Some forces were used as well such as defining the wind, the gravity, and a deflector was used as well. These forces would be added to the Force property in the Particle View window while the deflector was set as a collision where the tear particles would collide.
The Spawn property was created along with a variation of approximately 30. With the “Inherited” property set down to zero, this can create longer trails on each particle trickling down.
Finally, the “Shape” property is added to define the shape and form of the particle tears. The shape is set to circle and can be scaled down to size.
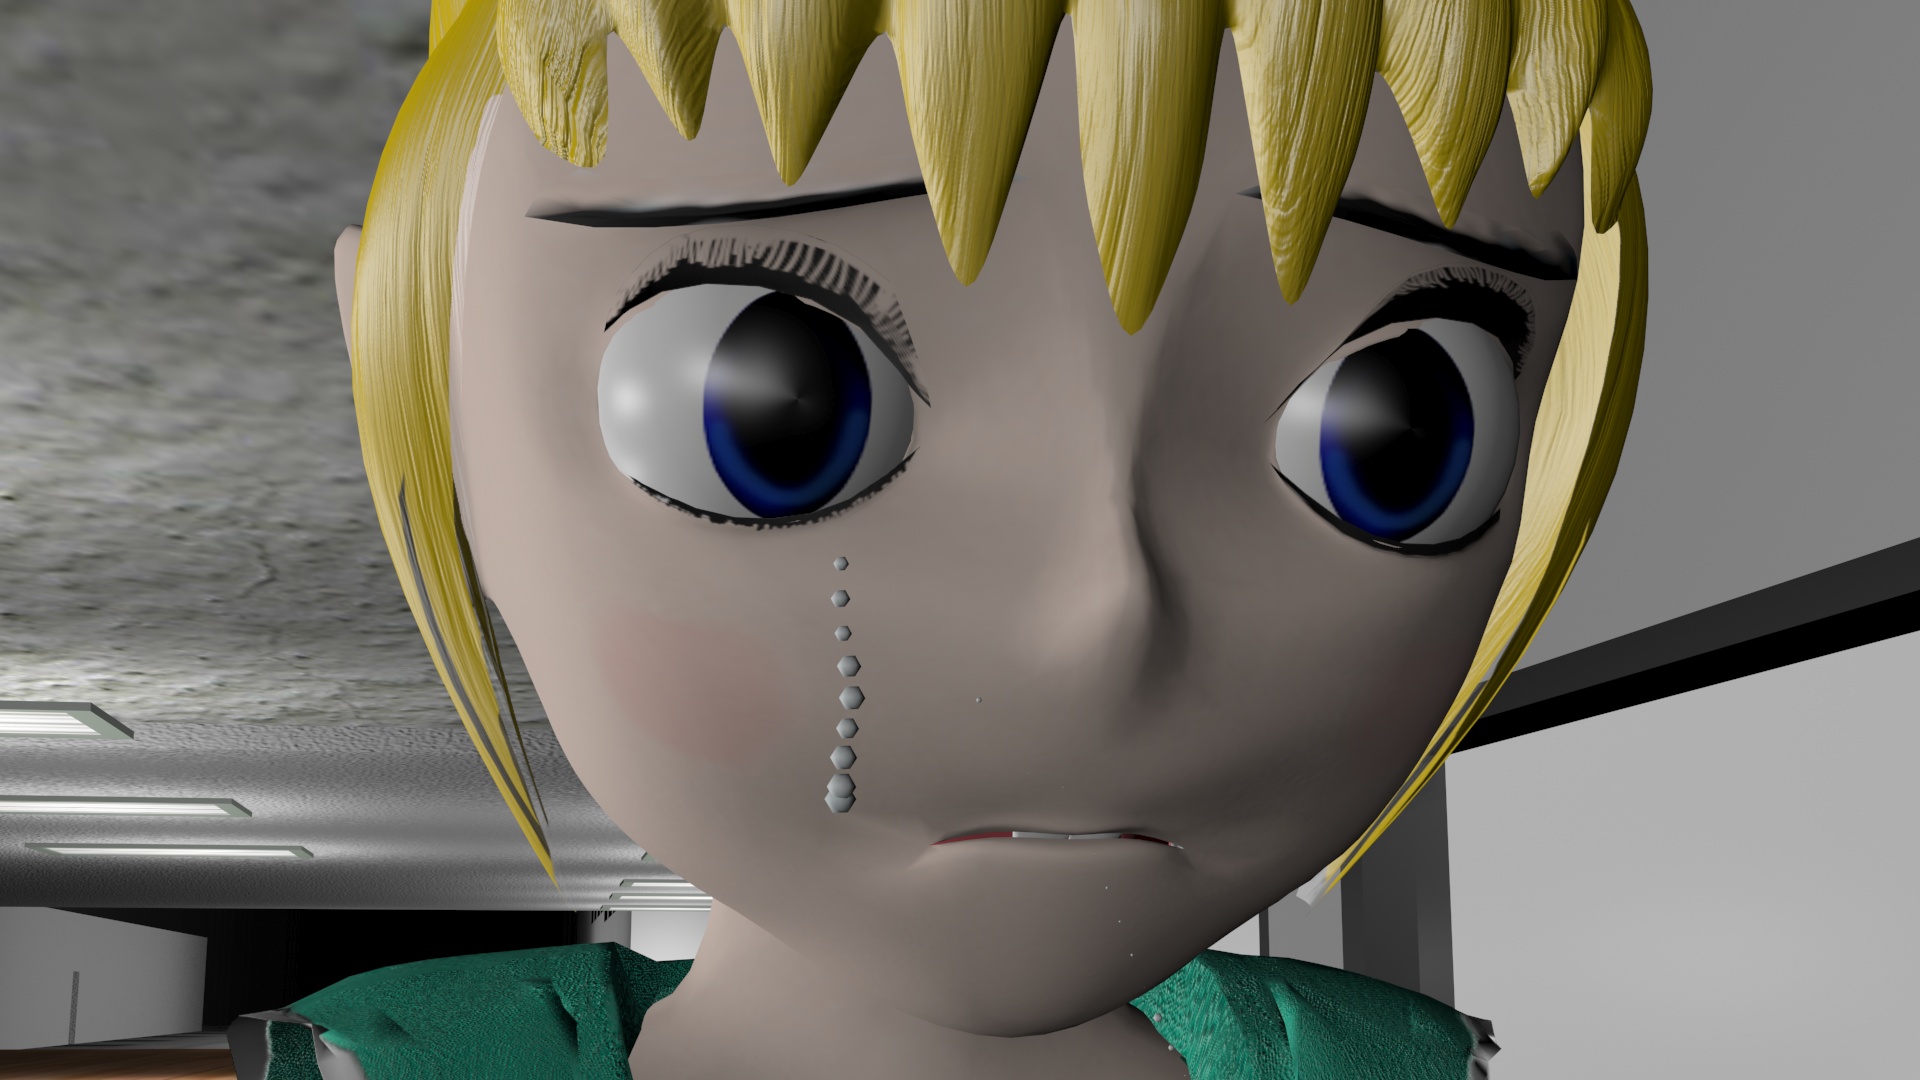
The particle system, as used to animate Heather's tears.
The particle system was used to create the egg white dropping onto the pan from a self-breaking egg while the yolk was created from a basic sphere. The particle system was used to generate popping popcorn after Meinsuzer struck the corn plant with lightning.
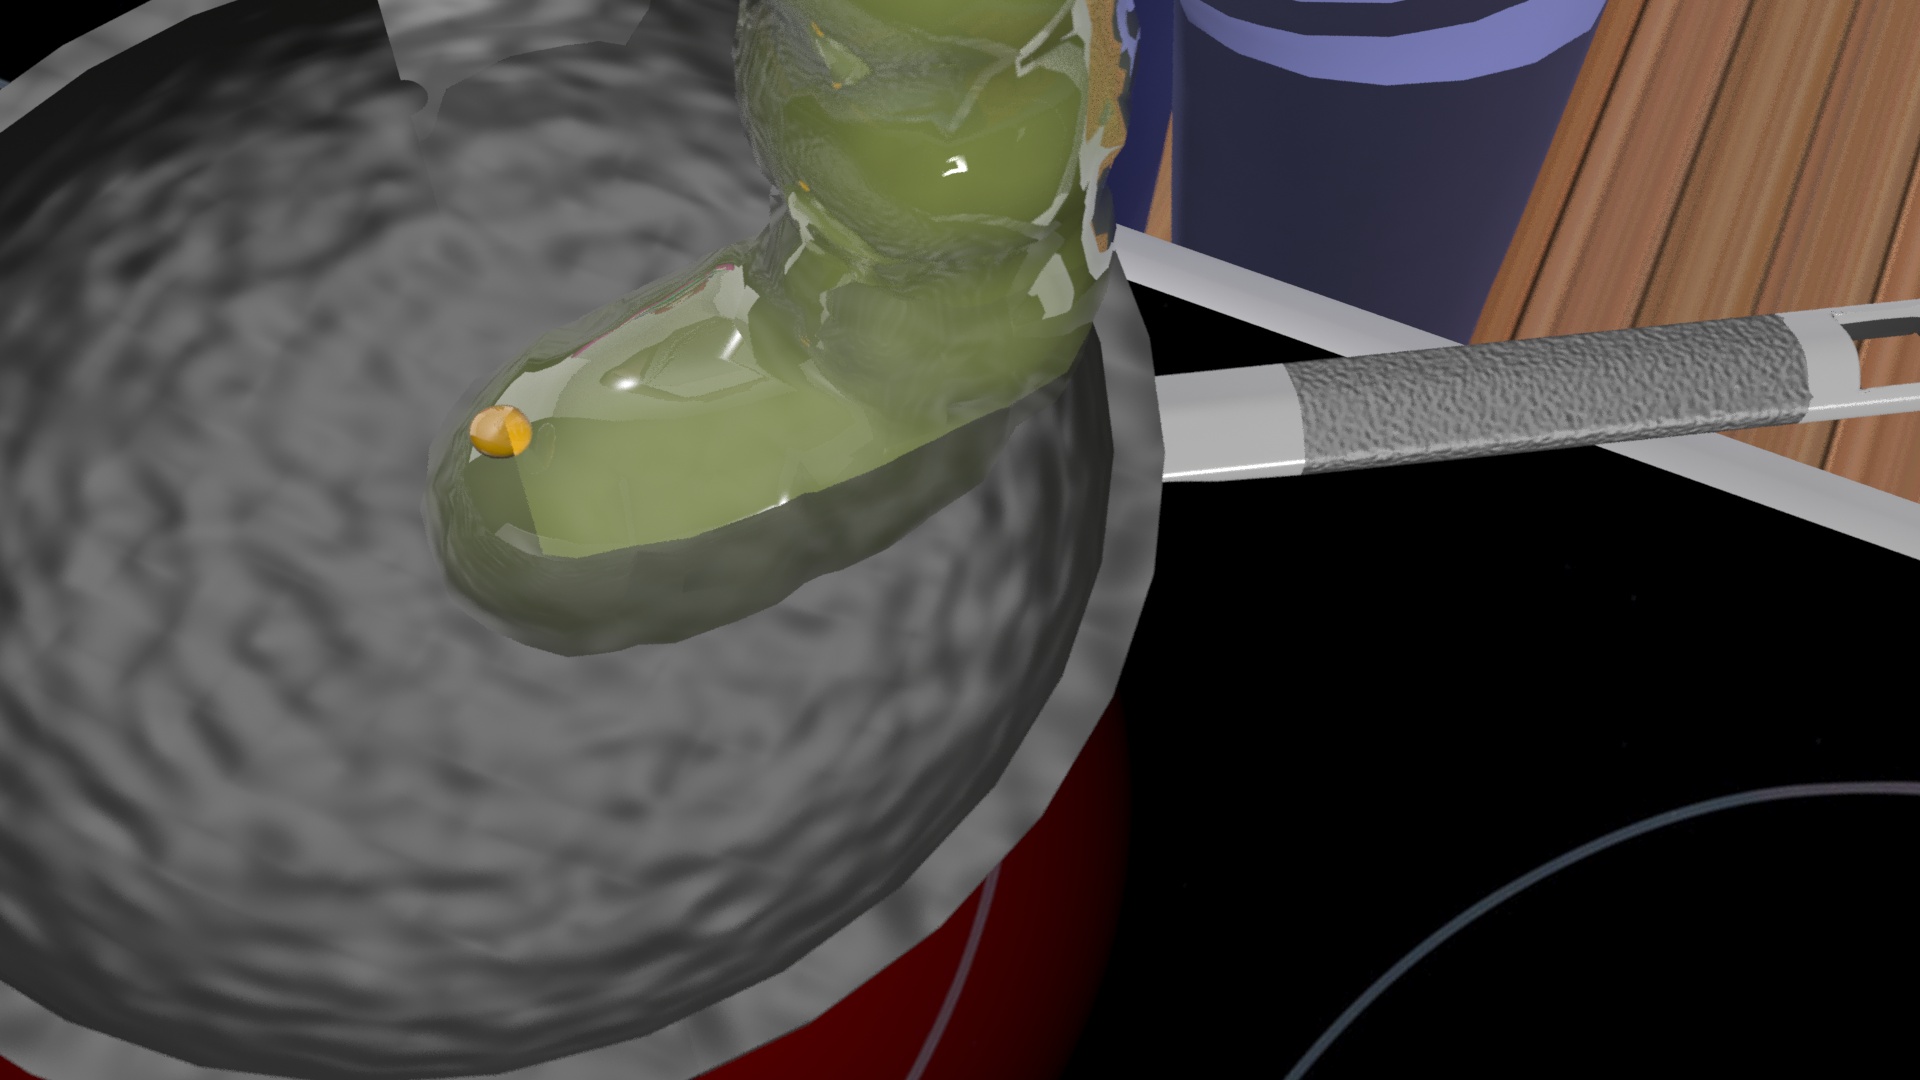
The particle system as used to create egg whites.
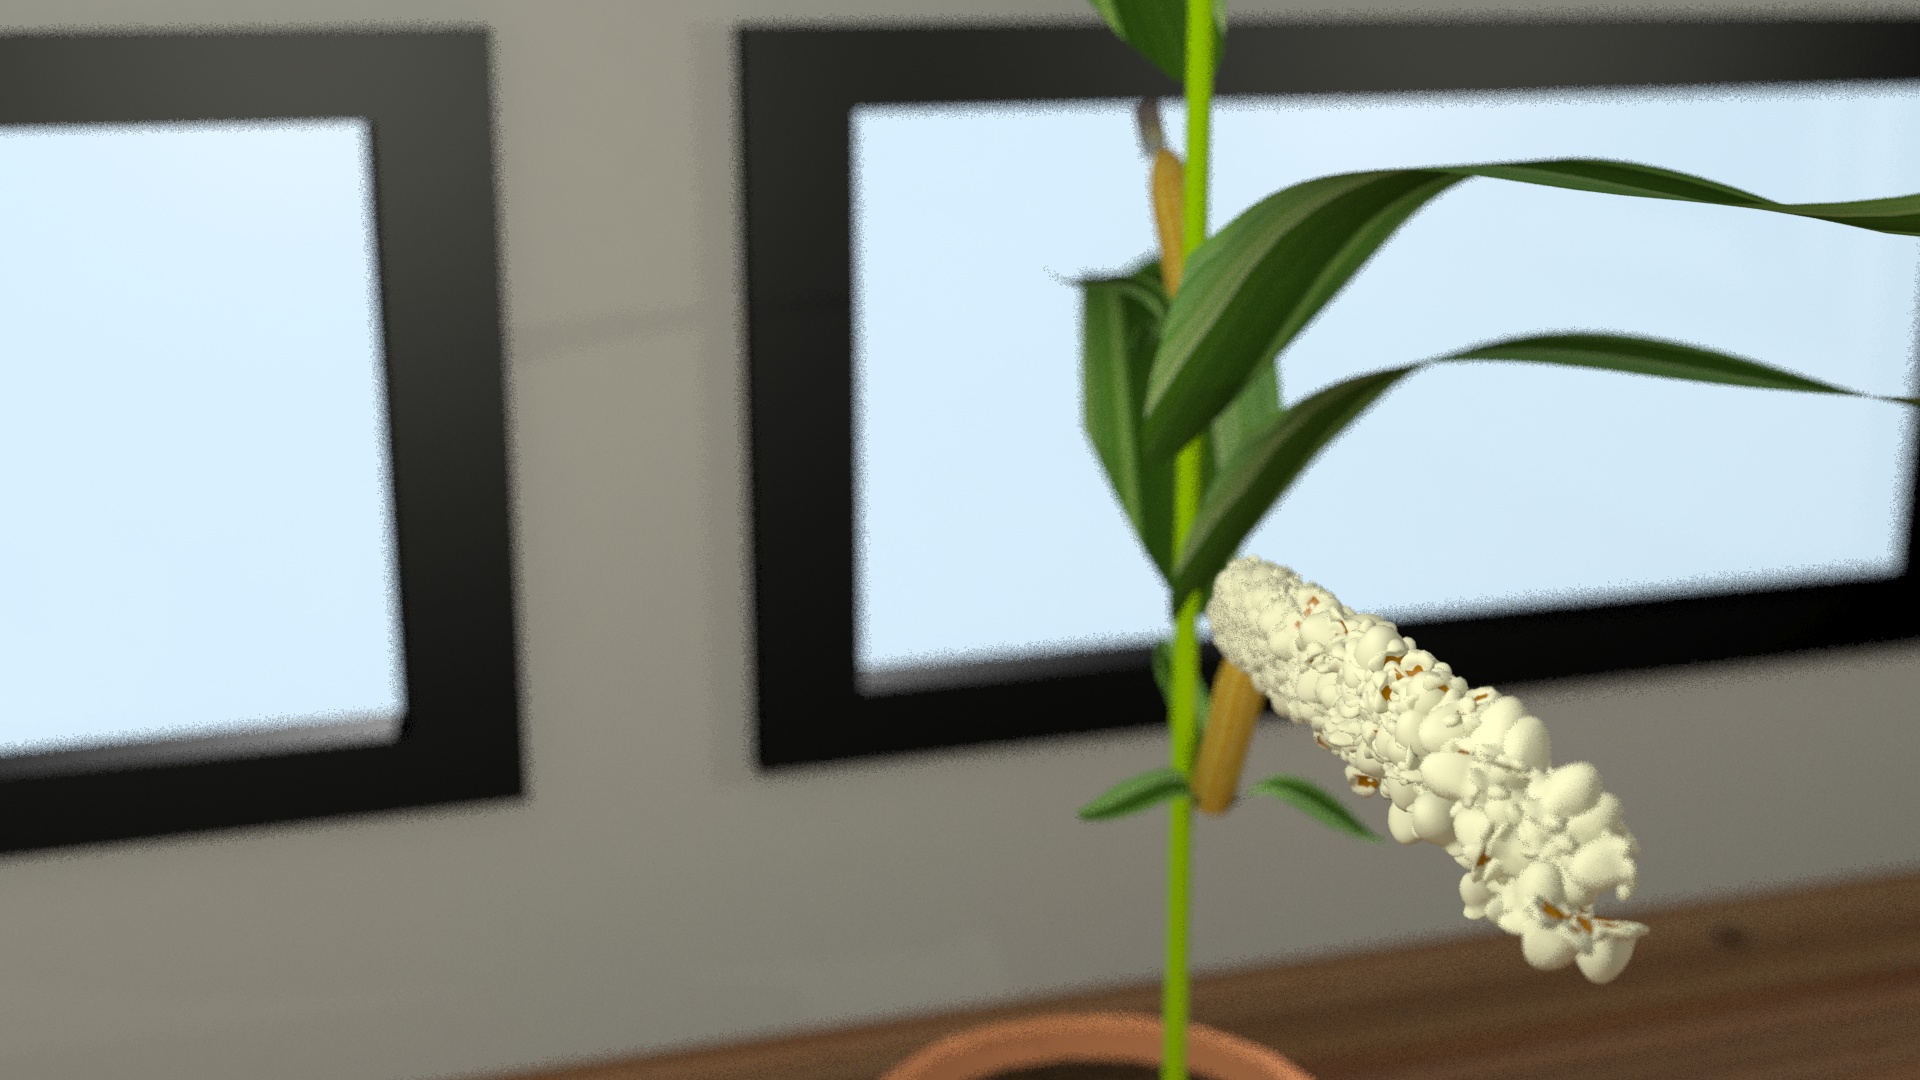
The particle sprayer was used to emit the popcorn popping out from the corn plant.
The MassFX was used for Heather’s Under the Weather for breaking windows. For each broken window caused by Amanda’s screaming at the top of her voice, a sphere was created in place of the collision object.
Each plane was created for the window glasses, which were textured with an invisible texture with a reflection / refraction map. The sphere-shaped collision object would be animated across through the window at breakneck speed in order to achieve the effect, and to do so, the window pieces had to be broken up into uneven separate pieces by applying the “Edit Poly” modifier. (Go to the edges button (shaped like a triangle) and clicking on the “Split Mesh” button to divide a flat plane into uneven edges.)
The glasses would be set to Dynamic Rigid Body for which it would be affected by gravity and forces. Then, the sphere would be set to Kinematic Rigid Body as the collision object, which wasn’t affected by gravity and forces.
Once the entire Mass FX dynamic is completely set up, I clicked on the “Bake All”, which only applied to any objects assigned to use the Mass FX. This would thoroughly process all the frames into what would be the animation for broken glass. Although the broken glass would not be affected, the sphere had to be hidden so that the glass looks like it was breaking by itself.
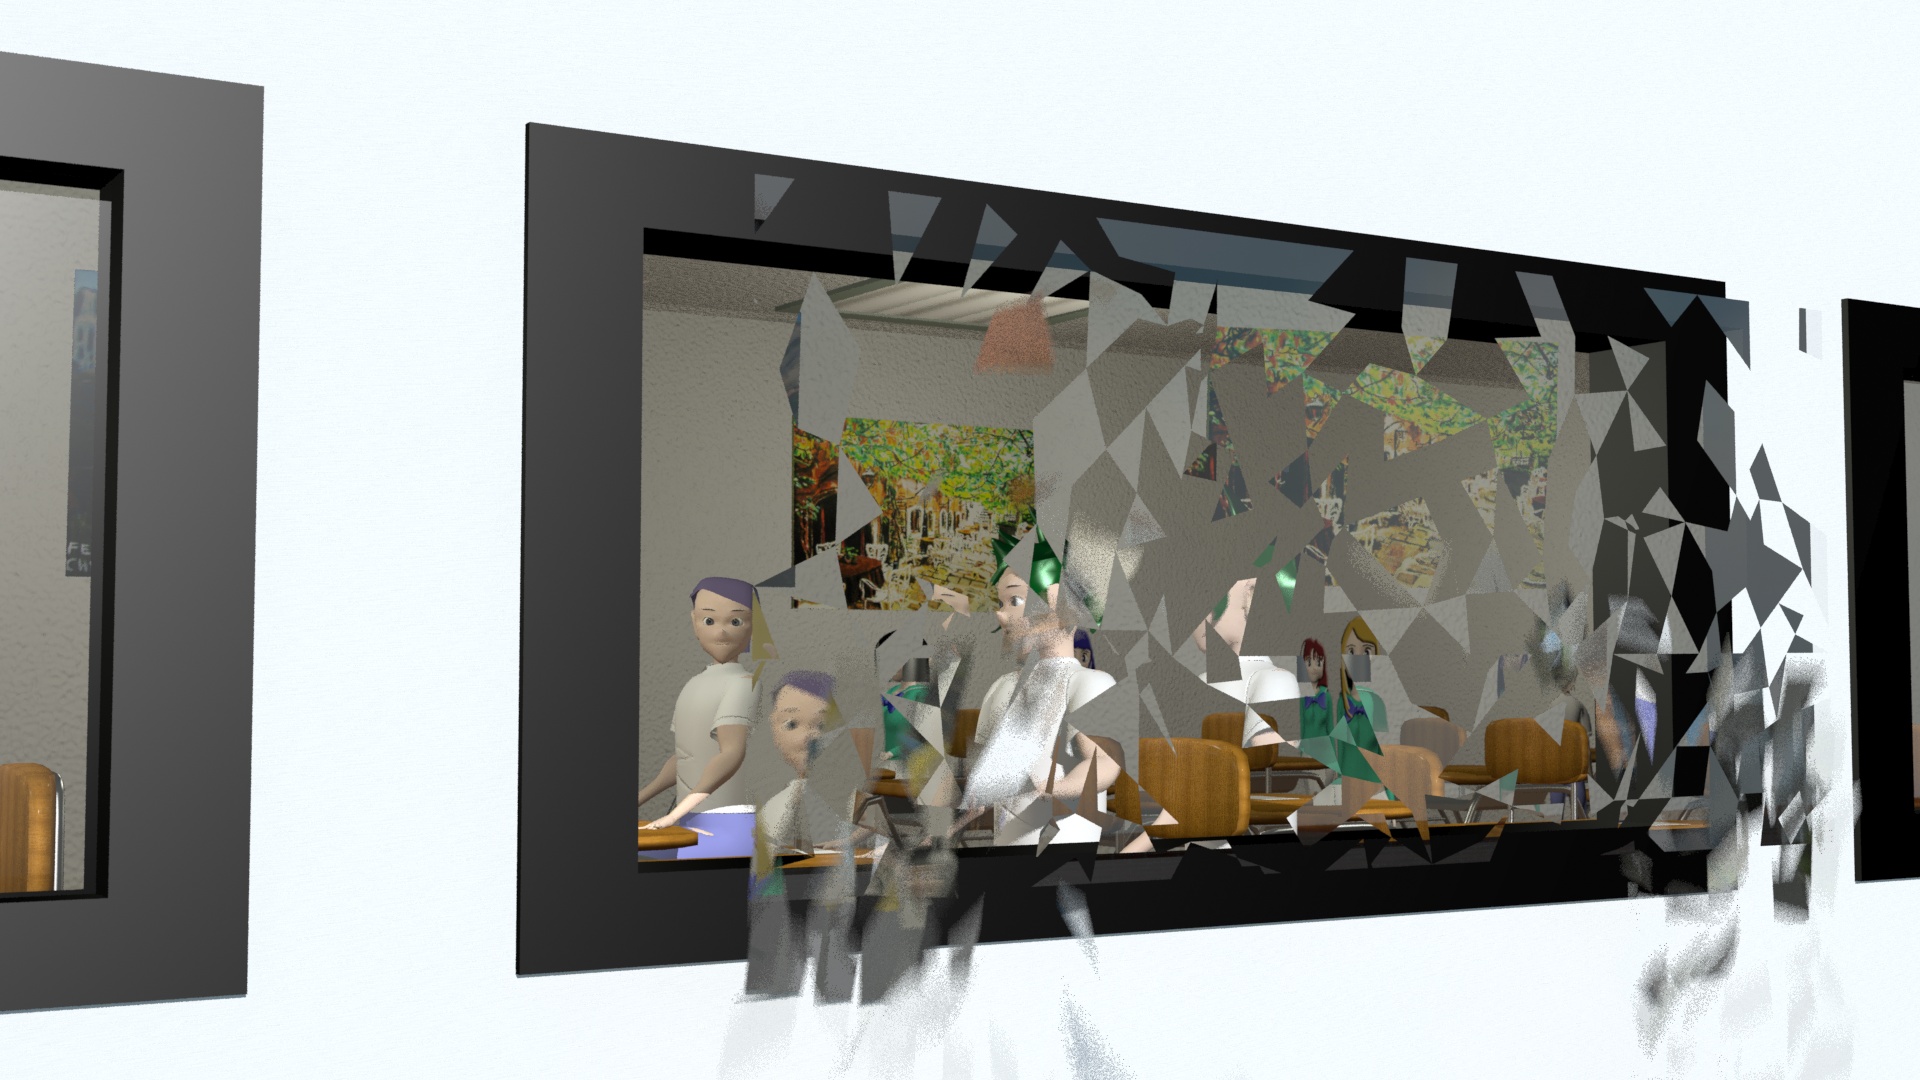
An example of using MassFX to animate broken glass off of a school window
LIGHTING
In order to prevent the reputation of the characters in the 3D universe looking creepy, lighting is very important. I used omni lights in this case. The three major lights used in each scene include the sky light, the fill light and the back light. As its name suggests, the sky light would be placed high above the ground while the other two would be near ground level. The sky light would have shadows applied and attenuation.
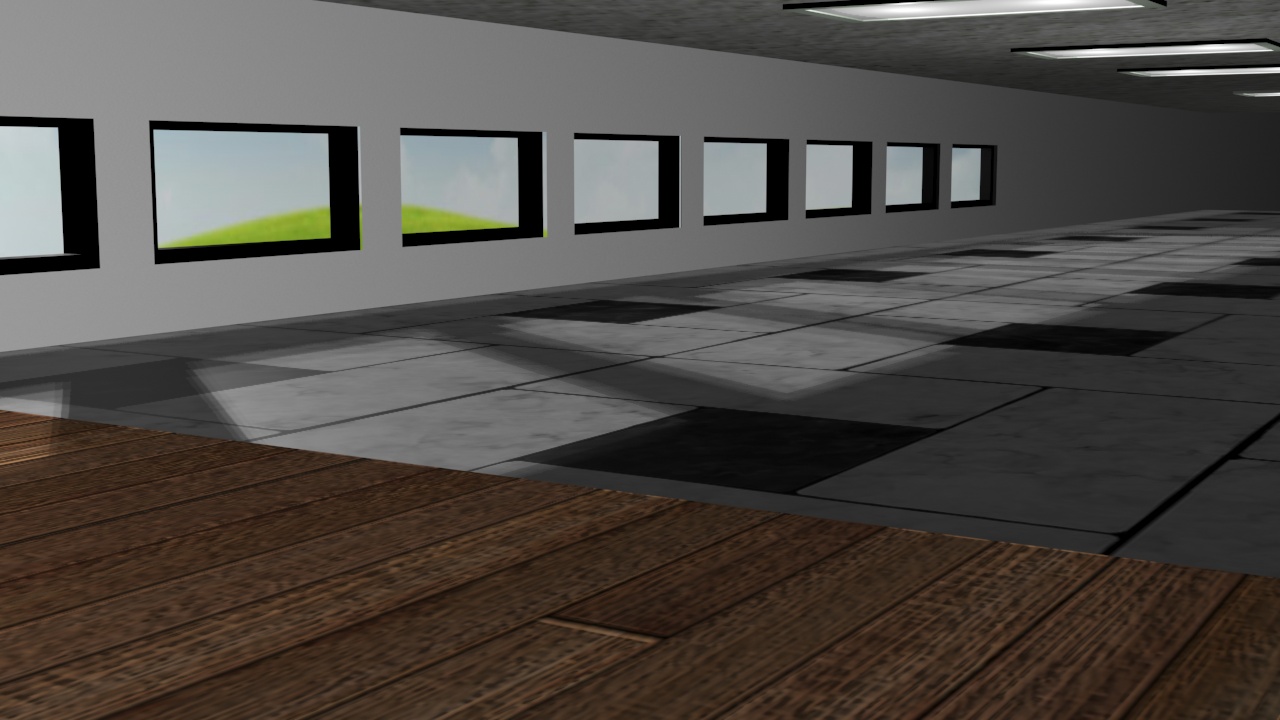
Attenuation lighting as shown in the hallway inside Cloudopolis High School.
For interior shots, several lights have to be applied near each fluorescent light inside the hallway and classrooms inside Cloudopolis High School. Each interior light would have attenuation applied, which would make the light darker as the light gets near the edges and corners of the wall.
CAMERAS & DEPTH OF FIELD
Cameras have proven themselves useful for animating tracking views such as dollying, panning and zooming. The cameras created were target cameras, which consist of two objects, the camera and the target object. These can be moved independently.
The target can be used where the focal point would focus the depth of field from the background to the foreground.
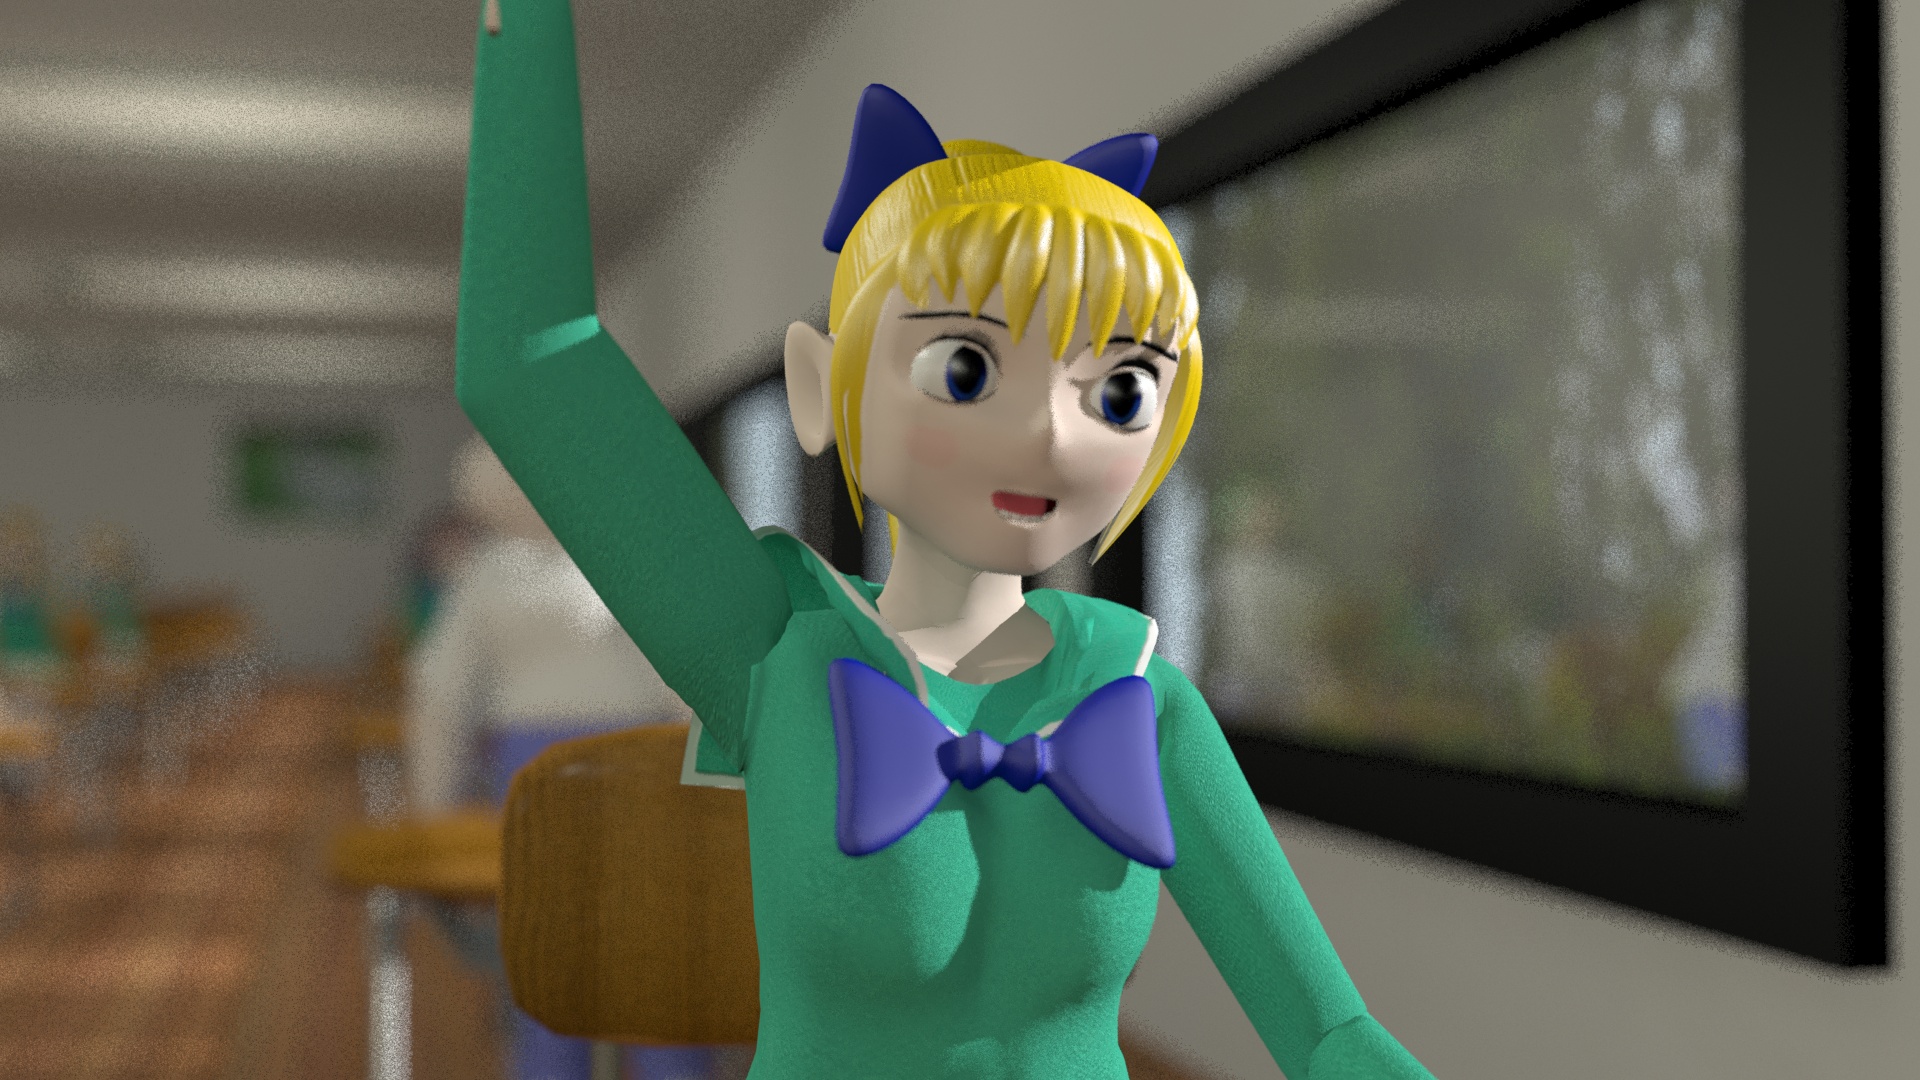
An example of using Depth of Field in which the background behind Heather appears blurry.
RENDERING
Last but not least, the last step in producing animation is rendering. Rendering is a process in which pixels were gathered and processed frame by frame into what would be the final animation complete with lights and camera motion.
However, there have been a few problems during the rendering process. The first problem was the AVI rendering process. Although Heather’s Under the Weather rendered AVI files at first, a problem arose when upon discovery in Vegas 13.0 (which I’ll talk about in the next section about “Editing”) that the AVI imported was cut shorter than the length that was opted for. It turns out that rendering an animation directly into an AVI can cut short if exceeding 2 gigabytes.
Instead, each frame was rendered into a JPEG. On occasion, some of the frames can turn out a bit uncanny. For instance, some of the frames were missing some of the needed objects. Fortunately, this can easily be resolved by dragging the timeline bar across the frame number and overwrite the defected frame.
A couple examples in which some frames were missing objects.
The second problem was the lengthy hours of rendering. Because of the basic lighting and animation setup, each frame would take thirty seconds to a minute worth of rendering per frame. Gradually, the rendering time would lengthen to eight minutes, occasionally thirty minutes per frame. Rendering does indeed have a setup window for setting the safeframe to widescreen 1080p.
EDITING
The program I used for post-production editing on Heather’s Under the Weather is Sony Vegas, which is the same program I used to edit Aldrid Von Pectos, except that it’s a 13.0 version as opposed to 4.0. Whereas the Flash animation was rendered as a lower-resolution video, the 3D animation would be rendered into high definition.
As I had mentioned of 3D animation sequence frames being rendered into JPEGs, these can be easily animated upon import. I selected the first JPEG sequence in the import window. Then, I checked “Import Sequence” and clicked on Import. This import can convert static JPEGs into an animation sequence. The rendering in Vegas is usually faster than that for 3Ds Max frame by frame.